Determine Power-CLI Object-Type

Background

If you needed to pass some „Objects“ to a Power-Shell function you need the name of their Types.

Example

Four Parameters need to be passed to the function:

  • two Objects
    1. VI-Server
    2. Virtual-Machine
  • two Strings:
    1. diskName
    2. diskSize
function resizeVMDisk { Param([VMware.VimAutomation.ViCore.Types.V1.VIServer]$server, [VMware.VimAutomation.ViCore.Types.V1.Inventory.VirtualMachine]$vm, [string]$diskName, [string]$diskSize)

Algorithm

  1. Find an existing PowerCLI-Function which already uses the Object-Parameter you need.

In my case:

Get-VMHost

2) Pull the MetaData of this Command.

3) Display the „Attributes“ of the relevant Object-Parameter

4) Look for „Target Type List“

Result

„VM“ = [VMware.VimAutomation.ViCore.Types.V1.Inventory.VirtualMachine]

„Server“ = [VMware.VimAutomation.ViCore.Types.V1.VIServer]

Example

C:\LAB> $cmd = Get-Command -Module VMware.VimAutomation.Core -Name Get-VMHost
C:\LAB> $meta = New-Object System.Management.Automation.CommandMetadata ($cmd)
C:\LAB> $meta

Name                    : Get-VMHost
CommandType             : VMware.VimAutomation.ViCore.Cmdlets.Commands.GetVMHost
DefaultParameterSetName : Default
SupportsShouldProcess   : False
SupportsPaging          : False
PositionalBinding       : True
SupportsTransactions    : False
HelpUri                 :
RemotingCapability      : PowerShell
ConfirmImpact           : None
Parameters              : {[Name, System.Management.Automation.ParameterMetadata], [NoRecursion, System.Management.Automation.ParameterMetadata], [VM,
                          System.Management.Automation.ParameterMetadata], [ResourcePool, System.Management.Automation.ParameterMetadata]…}


C:\LAB> $meta.Parameters["VM"].Attributes

Position                        : -2147483648
ParameterSetName                : SecondaryParameterSet
ValueFromPipeline               : True
Mandatory                       : False
ExperimentName                  :
ExperimentAction                : None
ValueFromPipelineByPropertyName : False
ValueFromRemainingArguments     : False
HelpMessage                     :
HelpMessageBaseName             :
HelpMessageResourceId           :
DontShow                        : False
TypeId                          : System.Management.Automation.ParameterAttribute

TypeId : System.Management.Automation.ValidateNotNullOrEmptyAttribute

Critical                        : True
ContextPrincipalName            :
ContextOptional                 : False
ContextRelationName             :
TargetTypeList                  : {VMware.VimAutomation.ViCore.Types.V1.Inventory.VirtualMachine}
TransformNullOptionalParameters : True
TypeId                          : VMware.VimAutomation.Sdk.Util10Ps.BaseCmdlet.ObnArgumentTransformationAttribute

C:\LAB> $meta.Parameters["Server"].Attributes

Position                        : -2147483648
ParameterSetName                : Default
ValueFromPipeline               : False
Mandatory                       : False
ExperimentName                  :
ExperimentAction                : None
ValueFromPipelineByPropertyName : False
ValueFromRemainingArguments     : False
HelpMessage                     :
HelpMessageBaseName             :
HelpMessageResourceId           :
DontShow                        : False
TypeId                          : System.Management.Automation.ParameterAttribute

Position                        : -2147483648
ParameterSetName                : ById
ValueFromPipeline               : False
Mandatory                       : False
ExperimentName                  :
ExperimentAction                : None
ValueFromPipelineByPropertyName : False
ValueFromRemainingArguments     : False
HelpMessage                     :
HelpMessageBaseName             :
HelpMessageResourceId           :
DontShow                        : False
TypeId                          : System.Management.Automation.ParameterAttribute

Position                        : -2147483648
ParameterSetName                : DistributedSwitch
ValueFromPipeline               : False
Mandatory                       : False
ExperimentName                  :
ExperimentAction                : None
ValueFromPipelineByPropertyName : False
ValueFromRemainingArguments     : False
HelpMessage                     :
HelpMessageBaseName             :
HelpMessageResourceId           :
DontShow                        : False
TypeId                          : System.Management.Automation.ParameterAttribute

Position                        : -2147483648
ParameterSetName                : SecondaryParameterSet
ValueFromPipeline               : False
Mandatory                       : False
ExperimentName                  :
ExperimentAction                : None
ValueFromPipelineByPropertyName : False
ValueFromRemainingArguments     : False
HelpMessage                     :
HelpMessageBaseName             :
HelpMessageResourceId           :
DontShow                        : False
TypeId                          : System.Management.Automation.ParameterAttribute

Critical                        : True
ContextPrincipalName            :
ContextOptional                 : False
ContextRelationName             :
TargetTypeList                  : {VMware.VimAutomation.ViCore.Types.V1.VIServer}
TransformNullOptionalParameters : True
TypeId                          : VMware.VimAutomation.Sdk.Util10Ps.BaseCmdlet.ObnArgumentTransformationAttribute
VMware ESXi: Generate Self-Signed Certificate for FQDN and retrieve SSL-Thumbprint

Background

VMware wants us to prepopulate an Excel-Sheet with SSH-Keys and SSL-Thumbprints of all ESXi-Hosts, who have been freshly deployed minutes before, which effectivly protects against man-in-the-middle-attacks – maybe a problem in US-datacenters.

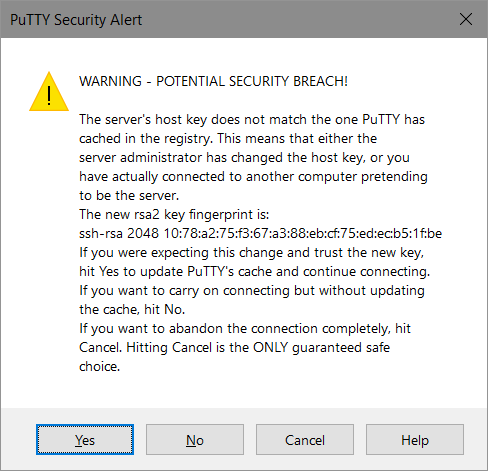
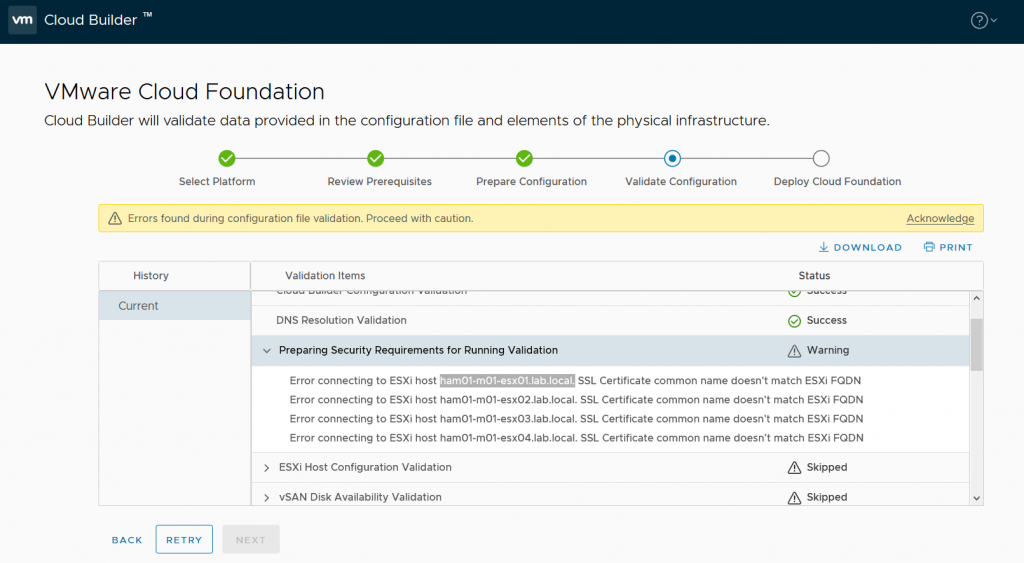
Beginning with VMware Cloud Foundation Release VCF 4.2 the Cloud-Builder-App verifies the „CN“ of all ESXi-SSL-Certificates, which is in default-setup set to „localhost“ (to be overwritten when connecting to the vCenter so this is seemed to be no issue) – not accepted, CN has to be set to <server-fqdn>.

VCF PreCheck: SSL Certificate CN Error

Solution

plink.exe

„plink.exe“ from the Putty-Suite allows to be called from PowerShell in automated fashion without interactive Password-Prompt. (In May 2021 there seems to be no other choice for Power-Shell Core 7)

Algorithm

  1. generate „correct“ self-signed certificate with „CN“ set to „fqdn“ not for „localhost“
  2. read the new certificate SSL-sha256-thumbprint
  3. reboot the ESXi-Host to activate the new SSL-Server-Certificate

Result

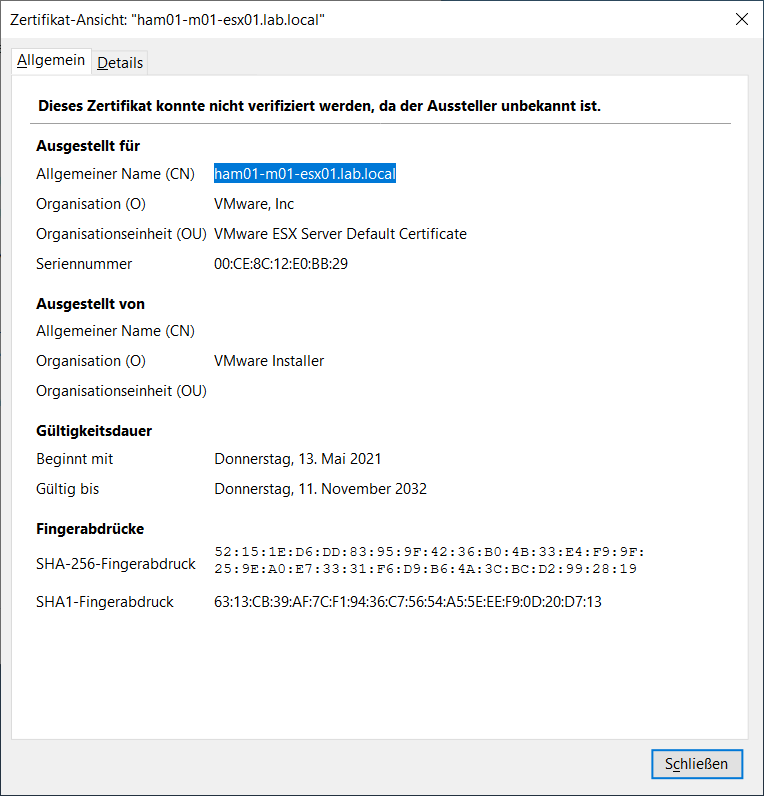
Correct SSL Server-Certificate

Server SSL-Certificate with correct CN

Log for four ESXi-Hosts

Contains SSL-Thumbprints to get copied into the VCF-Excel-Sheet.

Variables

  • $VMPassword
  • $VMUsername

have to be prepopulated.

PS T:\vmware vcf4> .\esxi_ssl_ssh.ps1
Generate SSL Self-Signed Certificate [ham01-m01-esx01]
Keyboard-interactive authentication prompts from server:
End of keyboard-interactive prompts from server
Fetch SSL-Thumbprint
Generate SSL Self-Signed Certificate [ham01-m01-esx02]
Keyboard-interactive authentication prompts from server:
End of keyboard-interactive prompts from server
Fetch SSL-Thumbprint
Generate SSL Self-Signed Certificate [ham01-m01-esx03]
Keyboard-interactive authentication prompts from server:
End of keyboard-interactive prompts from server
Fetch SSL-Thumbprint
Generate SSL Self-Signed Certificate [ham01-m01-esx04]
Keyboard-interactive authentication prompts from server:
End of keyboard-interactive prompts from server
Fetch SSL-Thumbprint

*** Result ***
172.16.11.101 ham01-m01-esx01
SSL-Thumbprint: D2:6E:01:AD:36:82:3E:D2:AC:F3:66:6E:27:FC:A5:2C:26:99:57:8D:E6:D9:24:E3:42:61:F3:C3:52:65:8C:36
172.16.11.102 ham01-m01-esx02
SSL-Thumbprint: 21:67:3F:11:E4:FE:F3:D2:D9:C6:C2:66:85:7D:3D:3F:02:49:F2:FE:D6:74:86:E1:8E:BE:CC:A2:66:41:72:D2
172.16.11.103 ham01-m01-esx03
SSL-Thumbprint: F6:D3:12:BD:53:36:F0:E5:FD:C9:F9:3C:41:60:80:79:C8:C4:69:30:52:AF:6C:AF:24:C3:C6:DE:2A:75:80:14
172.16.11.104 ham01-m01-esx04
SSL-Thumbprint: AC:0B:D0:E3:6D:03:12:3F:7E:69:5F:0F:75:F0:F5:F2:E1:59:61:46:83:35:1F:AD:2C:15:9D:EB:C1:9D:EF:DE

PowerShell Sourcecode

$NestedESXiHosts = @{
    "ham01-m01-esx01"=@{"vmk0"="172.16.11.101"};
    "ham01-m01-esx02"=@{"vmk0"="172.16.11.102"};
    "ham01-m01-esx03"=@{"vmk0"="172.16.11.103"};
    "ham01-m01-esx04"=@{"vmk0"="172.16.11.104"};
}

$NestedESXiHosts.GetEnumerator() | Sort-Object -Property key | Foreach-Object {
	$VMName = $_.Key
	$VMIPAddress = $_.Value.vmk0
	
	write-host -ForegroundColor Green "Generate SSL Self-Signed Certificate [$VMName]"
	#
	$SSLThumbPrint = echo y | plink -ssh -pw $VMPassword $VMUsername@$VMIPAddress "/sbin/generate-certificates;openssl x509 -in /etc/vmware/ssl/rui.crt -fingerprint -sha256 -noout;reboot;"
    #
	write-host -ForegroundColor Green "Fetch SSL-Thumbprint"
	#
	$SSLThumbPrint = $SSLThumbPrint.split("=")[1]
	$_.Value.SSL = $SSLThumbPrint
}

write-host
write-host -ForegroundColor Green "*** Result ***"

$NestedESXiHosts.GetEnumerator() | Sort-Object -Property key | Foreach-Object {
	$VMName = $_.Key
	$VMIPAddress = $_.Value.vmk0
	$VMSSL = $_.Value.SSL
	write-host -ForegroundColor Green "$VMIPAddress $VMName"
	write-host "SSL-Thumbprint: $VMSSL"
}              

Visio Diagrams with Python: Resize to fit

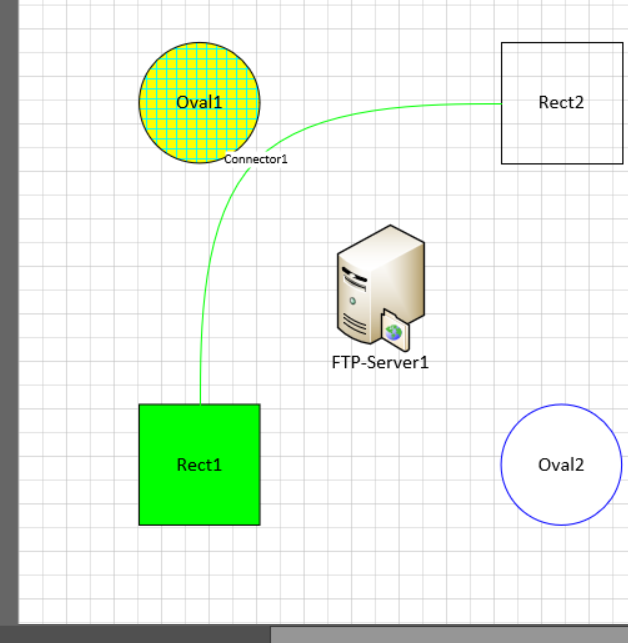
Resize Page to Fit Contents, Set Zoom to Fit Page

When the drawing is ready, the size of the page will be too large or too small – „fit to contents“ might be the solution.

Additionally, I prefer the Zoom of the active Window to be set that it shows the whole drawing.

page.ResizeToFitContents()      #https://docs.microsoft.com/de-de/office/vba/api/visio.page.resizetofitcontents
window = visio.ActiveWindow     #https://docs.microsoft.com/de-de/office/vba/api/visio.application.activewindow
window.ViewFit=1                #https://docs.microsoft.com/de-de/office/vba/api/visio.window.viewfit

Result

Visio Diagrams with Python: Colors

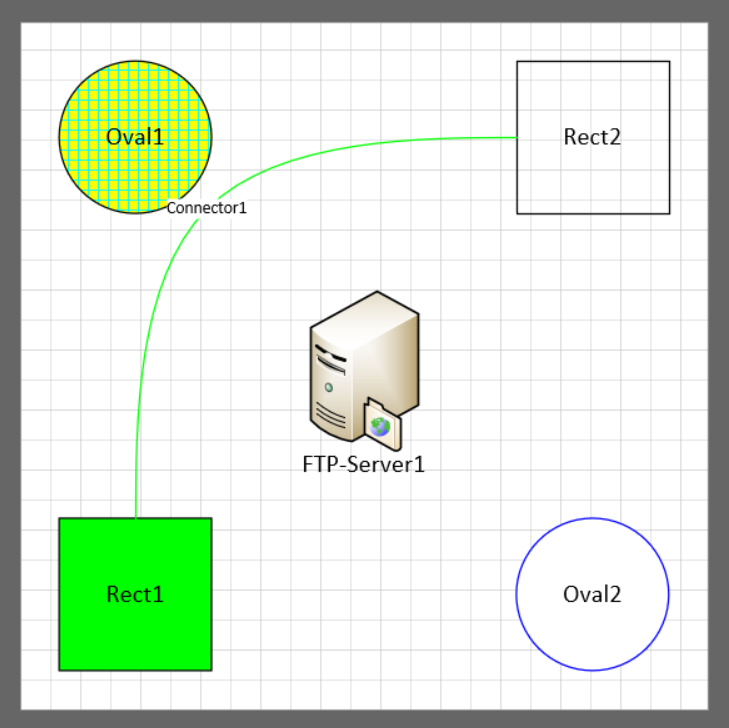
24 Colors to choose from.

„Cells“ contain all „Shape-Format“-Properties

Details: https://docs.microsoft.com/en-us/office/client-developer/visio/cells-visio-shapesheet-reference

# Line-Color
# https://docs.microsoft.com/de-de/office/client-developer/visio/linecolor-cell-line-format-section
oval2.Cells("LineColor").FormulaForce = 3

# Fill-Color
# https://docs.microsoft.com/de-de/office/client-developer/visio/fillforegnd-cell-fill-format-section
rect1.Cells("FillForegnd").FormulaForce=3

# Fill-Pattern "0" - no fill
# https://docs.microsoft.com/de-de/office/client-developer/visio/fillpattern-cell-fill-format-section
rect2.Cells("FillPattern").FormulaForce=0

# Fill-Pattern "3"

# yellow background
# https://docs.microsoft.com/de-de/office/client-developer/visio/fillbkgnd-cell-fill-format-section
#
# light-blue foreground
#
oval1.Cells("FillPattern").FormulaForce = 3
oval1.Cells("FillBkgnd").FormulaForce = 5
oval1.Cells("FillForegnd").FormulaForce = 7

Result

Visio Diagrams with Python: Connectors

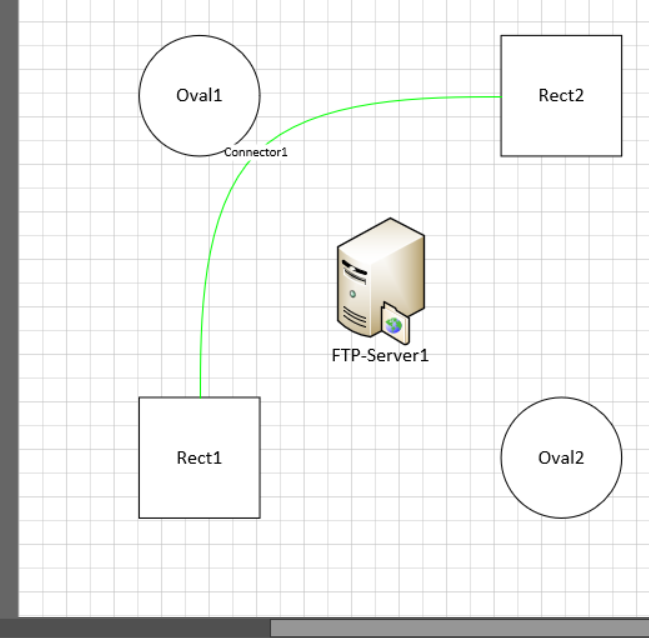
Connect two existing Shapes

The API is somehow weird, since it creates an (Shape-)Object, but it doesn’t return it.

  • you’ll have to fetch the last object in the shapes-List
#https://docs.microsoft.com/en-us/office/vba/api/visio.shape.autoconnect
rect1.AutoConnect(rect2,0)
#
#https://docs.microsoft.com/en-us/office/vba/api/visio.shapes.itemu
connector1=shapes.ItemU(len(shapes))
#
connector1.Text = "Connector1"
# 
#https://docs.microsoft.com/de-de/office/client-developer/visio/linecolor-cell-line-format-section
# * color "3" is "light green"
connector1.Cells("LineColor").FormulaForce = 3
#
#https://docs.microsoft.com/de-de/office/client-developer/visio/conlinerouteext-cell-shape-layout-section
# * ConLineRouteExt "2" is "Curved"
connector1.Cells("ConLineRouteExt").FormulaForce = 2

Result

>>> len(shapes)
6

Visio Diagrams with Python: Stencils

Stencils and Stencil-Files

Stencils are stored in „VSSX“-Files

server_stencils_filename = "C:\Program Files (x86)\Microsoft Office\root\Office16\Visio Content\1031\SERVER_M.VSSX"

#64 means “open hidden”
server_stencils = visio.Documents.OpenEx(server_stencils_filename,64)

ftp_stencil=server_stencils.Masters("FTP-Server")

Page-Object

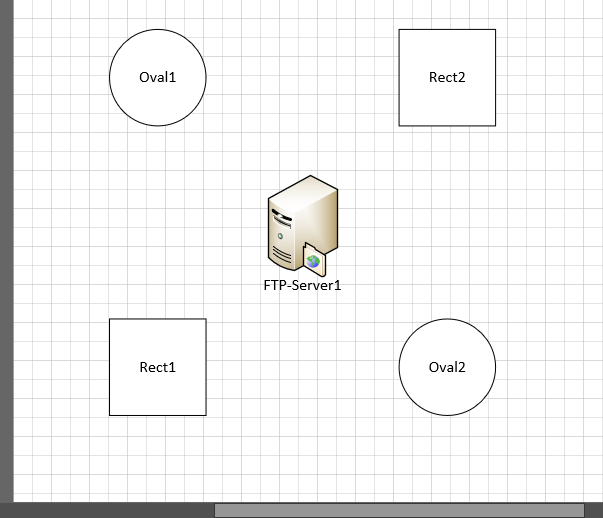
Add a FTP-Server to the page

ftp1 = page.Drop(ftp_stencil,3,3)
ftp1.Text = "FTP-Server#1"

Result

>>> len(shapes)
5

Visio Diagrams with Python using COM

Visualize Data from Python in Visio

I needed to illustrate some data discovered by a python script in Microsoft Visio.

As a starting-point i found two sources of infomation in the Internet:

(1) Python => COM => MS Excel

How to access a Windows COM-Application from Python: https://pbpython.com/windows-com.html

  • MS Excel not Visio
  • but 50% of the information needed

(2) PowerShell => COM => MS Visio

How to access Microsoft Visio using the COM-Interface https://www.powershellstation.com/2016/01/20/powershell-and-visio-1

  • PowerShell
  • the other 50% needed.

Result: „Python => COM => MS Visio“

Putting both pieces together, will allow a Python-Script to control MS Visio.

(3) MS Visio „Object Model“

Without the original documentation provided by Microsoft: https://docs.microsoft.com/en-us/office/vba/api/overview/visio there is _no chance_ to get anything to work.

  • the next 50% 😉

The Basics

(1) Python „PyWin32“

Install „PyWin32“-Library

C:\RH>pip install pywin32
Collecting pywin32
  Downloading pywin32-300-cp38-cp38-win_amd64.whl (9.3 MB)
     |████████████████████████████████| 9.3 MB 2.2 MB/s
Installing collected packages: pywin32
Successfully installed pywin32-300

Access Windows/COM from Python

  • open the Visio-Application
    • „visio“-object: stores a pointer to access application-Level functions
  • add a document
    • „document“-object
  • fetch the active Visio-Page
    • „page“-object
  • fetch the list of all Shapes at this page
    • „shapes“-object
import win32com.client as win32
#
visio = win32.gencache.EnsureDispatch('Visio.Application')
document = visio.Documents.Add("")
#
page = visio.ActivePage
#
shapes = page.Shapes

(2) Explore the Visio-Object-Model

Methods

Object-Methods could get discovered using the Python „dir“, notice for example

  • DrawOval
  • DrawRectangle
>>> dir(page)
['AddDataVisualization', 'AddGuide', 'AutoConnectMany', 'AutoSizeDrawing', 'AvoidPageBreaks', 'BoundingBox', 'CLSID', 'CenterDrawing', 'CreateDataVisualizerDiagram', 'CreateSelection', 'Delete', 'DrawArcByThreePoints', 'DrawBezier', 'DrawCircularArc', 'DrawLine', 'DrawNURBS', 'DrawOval', 'DrawPolyline', 'DrawQuarterArc', 'DrawRectangle', 'DrawSpline', 'Drop', 'DropCallout', 'DropConnected', 'DropContainer', 'DropIntoList', 'DropLegend', 'DropLinked', 'DropMany', 'DropManyLinkedU', 'DropManyU', 'Duplicate', 'Export', 'GetCallouts', 'GetContainers', 'GetFormulas', 'GetFormulasU', 'GetResults', 'GetShapesLinkedToData', 'GetShapesLinkedToDataRow', 'GetTheme', 'GetThemeVariant', 'Import', 'InsertFromFile', 'InsertObject', 'Layout', 'LayoutChangeDirection', 'LayoutIncremental', 'LinkShapesToDataRows', 'OpenDrawWindow', 'Paste', 'PasteSpecial', 'PasteToLocation', 'Print', 'PrintTile', 'ResizeToFitContents', 'SetFormulas', 'SetResults', 'SetTheme', 'SetThemeVariant', 'ShapeIDsToUniqueIDs', 'SpatialSearch', 'SplitConnector', 'UniqueIDsToShapeIDs', 'VisualBoundingBox', '_ApplyTypes_', '__call__', '__class__', '__delattr__', '__dict__', '__dir__', '__doc__', '__eq__', '__format__', '__ge__', '__getattr__', '__getattribute__', '__gt__', '__hash__', '__init__', '__init_subclass__', '__int__', '__iter__', '__le__', '__lt__', '__module__', '__ne__', '__new__', '__reduce__', '__reduce_ex__', '__repr__', '__setattr__', '__sizeof__', '__str__', '__subclasshook__', '__weakref__', '_get_good_object_', '_get_good_single_object_', '_oleobj_', '_prop_map_get_', '_prop_map_put_', 'coclass_clsid', 'old_Paste', 'old_PasteSpecial']

Properties

But Object-Parameters won’t and if you don’t want to guess required parameters of Object-Methods, it’s time to bookmark the original documentation provided by Microsoft: https://docs.microsoft.com/en-us/office/vba/api/overview/visio

Start drawing

Page-Object

A good starting point might be the „Page“-Object: https://docs.microsoft.com/en-us/office/vba/api/visio.page

Well add „Shapes“ to the „Page“(-Object) using Methods of the Page-Object:

https://docs.microsoft.com/en-us/office/vba/api/visio.page.drawrectangle or https://docs.microsoft.com/en-us/office/vba/api/visio.page.drawoval – both Methods will return an „Shape“-Object.

#https://docs.microsoft.com/en-us/office/vba/api/visio.page.drawrectangle
rect1 = page.DrawRectangle(1,1,2,2)
rect2 = page.DrawRectangle(4,4,5,5)
#
#https://docs.microsoft.com/en-us/office/vba/api/visio.page.drawoval
oval1 = page.DrawOval(1,4,2,5)
oval2 = page.DrawOval(4,1,5,2)

Shape Object

Look at https://docs.microsoft.com/en-us/office/vba/api/visio.shape – there’s a „Text“-Property:

#https://docs.microsoft.com/en-us/office/vba/api/visio.shape
#https://docs.microsoft.com/en-us/office/vba/api/visio.shape.text
rect1.Text="Rect1"
rect2.Text="Rect2"
oval1.Text="Oval1"
oval2.Text="Oval2"

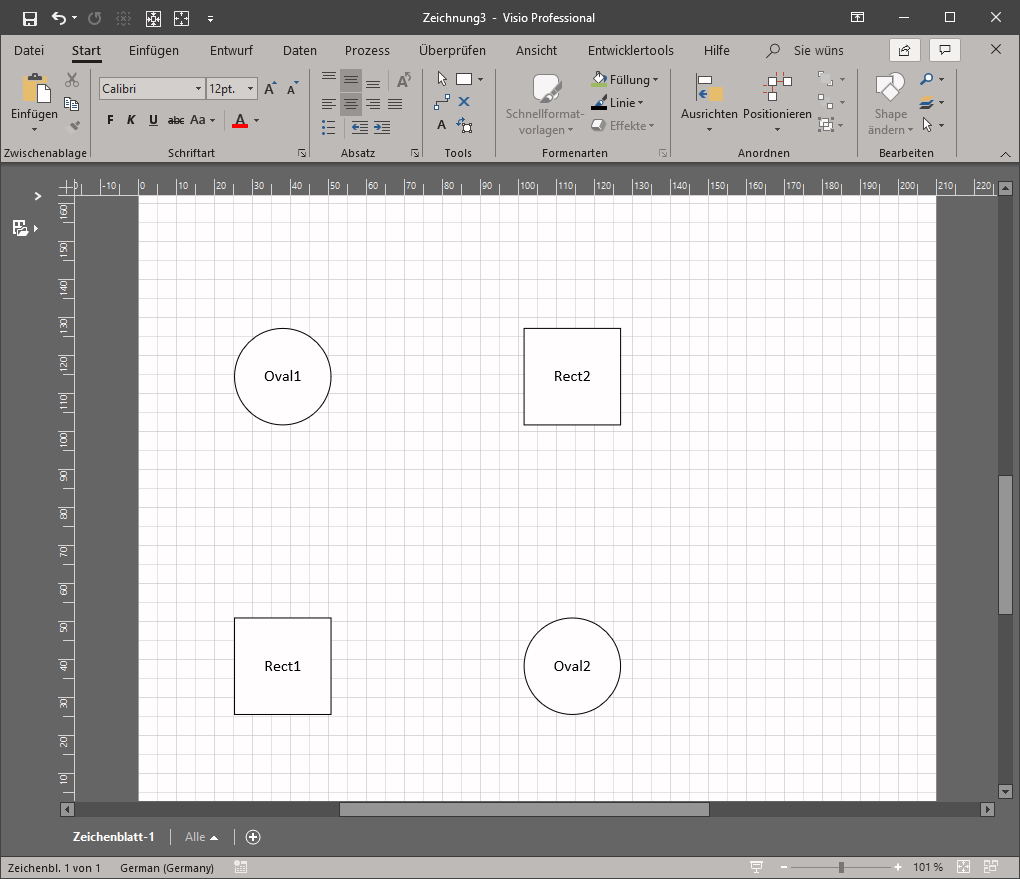
Result

>>> len(shapes)
4

Microsoft Azure – Hyperthreading and Nested Virtualization

Go to https://docs.microsoft.com/en-us/azure/virtual-machines/acu and look for:

***Hyper-threaded and capable of running nested virtualization

The following „script“ pulls the SKUs out of the table:

wget -O - --no-check-certificate https://docs.microsoft.com/en-us/azure/virtual-machines/acu | egrep -B2 "\*\*\*" | egrep "data-linktype" | sed -E "s/^.+relative-path..([^\<]+).+$/SKU: \1/g"
C:\RH>echo "Hyper-threaded and capable of running nested virtualization" && wget -q -O - --no-check-certificate https://docs.microsoft.com/en-us/azure/virtual-machines/acu | egrep -B2 "\*\*\*" | egrep "data-linktype" | sed -E "s/^.+relative-path..([^\<]+).+$/SKU: \1/g"
"Hyper-threaded and capable of running nested virtualization"
SKU: D_v3
SKU: Ds_v3
SKU: Dv4
SKU: Dsv4
SKU: Ddv4
SKU: Ddsv4
SKU: E_v3
SKU: Es_v3
SKU: Ev4
SKU: Esv4
SKU: Edv4
SKU: Edsv4
SKU: F2s_v2 - F72s_v2
SKU: M

Next Step? Finding one with enough memory for an acceptable price.

Provision a Cisco CSR1000V-Router as Virtual-Box-VM with sliptreamed Configuration, wait until it’s up and open an Putty-SSH-Connection

The existing Windows-Comman-Script has been enhanced so it now

  • waits until the Router-VM is up
  • got an IP-Address assigned using DHCP.

For Demonstration-Purposes an SSH-Connection will be established.

  • The public-key of my laptop-ssh-client is part of the slipstreamed Router-Configuration.

Deploy a Router-VM with hostname „CSY“.

C:\RH\work\entwicklung\csr1000v-provision-in-virtualbox>CSR1000v-Virtual-Box.cmd CSY
Virtual machine 'CSY' is created and registered.
UUID: 915a7495-0728-4fc5-9c4c-21b3106a07e5
Settings file: 'c:\RH\LAB\VM\CSY\CSY.vbox'
Creating ISO image at c:\RH\LAB\VM\CSY\CSY_config.iso, 1 Files, Size: 8,00 KB
100%
0%...10%...20%...30%...40%...50%...60%...70%...80%...90%...100%
Medium created. UUID: b79d708a-0a0a-4866-853b-3ac45c6a6127
Waiting for VM "CSY" to power on...
VM "CSY" has been successfully started.
Waiting for VM "CSY" to be initialized...
Router "CSY" up and running, using IP=192.168.56.102
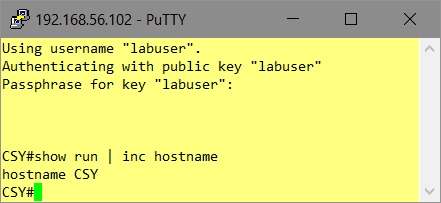
Establishing SSH-Connection as "labuser"
Done

Establish an SSH-Connection to the discovered Router-IP:

Have a look to the startup-config used:

This is the „CMD“-Script used:

@echo off

: Ronald Heitmann

:set VM=CSR1000vX
:set /p VM="Enter CSR1000v Hostname:"
: Parameter given? Use it as VM-Name
set VM=%1
if not defined VM set /p VM="Enter CSR1000v Hostname:"

:echo %VM%

set PUTTYUSER=labuser
set PUTTYPK=C:\RH\work\putty\labuser.ppk


set BASE=c:\RH\LAB\VM

set ISO=C:\Downloads\csr1000v-universalk9.16.09.0x.iso

: Create VM
:VBoxManage createvm --name %VM% --ostype "Linux_64" --basefolder %BASE% --register
VBoxManage createvm --name %VM% --ostype "Linux26_64" --basefolder %BASE% --register

:now the Path in the Filesystem to ...LOC... exists
set LOC=%BASE%\%VM%

: Create ISO containing slipstreamed config-file
: use UNXTOOLS "sed" to customize the "hostname"-Command
:
set CFGISO=%LOC%\%VM%_config.iso
set CFGSRC=C:\RH\LAB\VM\iosxe_config.txt
set CFGTXT=%LOC%\iosxe_config.txt
cat %CFGSRC% | sed "s/HOSTNAME/%VM%/g" > %CFGTXT%
"%ProgramFiles(x86)%"\CDBurnerXP\cdbxpcmd.exe --burn-data -file:%CFGTXT% -iso:%CFGISO% -format:iso

: Customize VM
VBoxManage modifyvm %VM% --memory 4096
VBoxManage modifyvm %VM% --vram 16
VBoxManage modifyvm %VM% --pae on --paravirtprovider default --hwvirtex on --nestedpaging on

: Storage
VBoxManage createhd --filename %LOC%\%VM%.vdi --size 8192
VBoxManage storagectl %VM% --name "IDE-CTL" --add ide --portcount 2 --bootable on
VBoxManage storageattach %VM% --storagectl IDE-CTL --port 0 --device 0 --type hdd --medium %LOC%\%VM%.vdi
VBoxManage storageattach %VM% --storagectl IDE-CTL --port 1 --device 0 --type dvddrive --medium %ISO%
VBoxManage storageattach %VM% --storagectl IDE-CTL --port 1 --device 1 --type dvddrive --medium %CFGISO%
VBoxManage modifyvm %VM% --boot1=dvd --boot2=disk --boot3=none --boot4=none

: Serial-Interfaces via "Pipe"
VBoxManage modifyvm %VM% --uartmode1 server \\.\pipe\%VM%
VBoxManage modifyvm %VM% --uart1 0x3f8 4
VBoxManage modifyvm %VM% --uartmode2 server \\.\pipe\%VM%_diag
VBoxManage modifyvm %VM% --uart2 0x2f8 4

: Audio
VBoxManage modifyvm %VM% --audio none

: NICs
VBoxManage modifyvm %VM% --nic1 nat --nic2 hostonly --nic3 hostonly --nic4 hostonly
VBoxManage modifyvm %VM% --nictype1 virtio --nictype2 virtio --nictype3 virtio --nictype4 virtio
VBoxManage modifyvm %VM% --nicpromisc1 allow-all --nicpromisc2 allow-all --nicpromisc3 allow-all --nicpromisc4 allow-all
VBoxManage modifyvm %VM% --hostonlyadapter2 "VirtualBox Host-Only Ethernet Adapter"
VBoxManage modifyvm %VM% --hostonlyadapter3 "VirtualBox Host-Only Ethernet Adapter"
VBoxManage modifyvm %VM% --hostonlyadapter4 "VirtualBox Host-Only Ethernet Adapter"

: Set the VM-Logo for the VirtualBox-Inventory
VBoxManage modifyvm %VM% --iconfile C:\RH\LAB\72px-Cisco_logo.svg.png

: Boot the VM, it'l reboot once to apply the running-config
VBoxManage startvm %VM% --type headless

: Wait for the VM to be fully initialized
: - with DHCP-IP-Address at "Gig 2"
: - and store this IP-Address in Variable VMIP
echo Waiting for VM "%VM%" to be initialized...
for /f %%I in ('python WaitForCDPNeighbor.py -n %VM% -c -i "VirtualBox Host-Only Ethernet Adapter" 2^> nul') do @(set VMIP=%%I)

echo Router "%VM%" up and running, using IP=%VMIP%

: Connect to Router using Putty/SSH
echo Establishing SSH-Connection as "%PUTTYUSER%"
start putty -ssh -i %PUTTYPK% %PUTTYUSER%@%VMIP%

echo Done

WaitForCDPNeighbor.py enhanced: Wait for CDP Hostname with usable connected IP-Address.

The following version adds a „-c“ option: „Connected IP-Address“-Check.

  • the script exits, when the Router-VM is up and running and has an usable IP-Address

The Script still checks all CDP-Packets received at the specified Interface:

  • If the Sender has the correct „Hostname“ it reads the CDP-Management-IP-Address announced.
  • This IP-Address has to be within the IP-Range of any connected IP-Network at the specified Interface.

So it’ll be possible to establish a SSH-Session to the router-VM.

C:\> echo %VM%
CSX

C:\> python WaitForCDPNeighbor.py -n %VM% -c -i "VirtualBox Host-Only Ethernet Adapter"
192.168.56.101
#! /usr/bin/env python

# Ronald Heitmann
#
import argparse

from scapy.all import *
load_contrib("cdp")

from netaddr import IPNetwork, IPAddress

from netifaces import AF_INET, AF_INET6, AF_LINK
import netifaces

# returns a list of all IP-Adresses bound to the specified Interface "if_name"
def get_connected(if_name):
  if_id = ""
  networks = []

  for i in ifaces.data.keys():
    iface = ifaces.data[i]
    wname = iface.data['name']
    if wname == if_name:
      if_id = i
      addresses = netifaces.ifaddresses(i)
      if AF_INET in addresses:
        for addr in netifaces.ifaddresses(i)[AF_INET]:
          #print(addr)
          ipnetwork = IPNetwork(addr["addr"]+"/"+addr["netmask"]).cidr
          networks.append(ipnetwork)
  #print(networks)
  return networks

# checks, if the IP-Address "ip" is within the subnet-range of any network contained in the list "networks"

def is_IP_connected(ip, networks):
  found = False
  ipnetwork = IPNetwork(ip).cidr

  for n in networks:
    if (ipnetwork in n):
      found = True

  return found

  
def main():

    # Parse CLI-Arguments
    parser = argparse.ArgumentParser(description='Wait for a CDP-Neighbor.')
    parser.add_argument("-i", "--interface", help="monitored interface", default="VirtualBox Host-Only Ethernet Adapter")
    parser.add_argument("-n", "--hostname", help="Neighbor to wait for", required=True)
    parser.add_argument("-c", "--connected", help="wait, until CDP-Neighbor announces an directly-connected IP-Address", action='store_true')
    args = parser.parse_args()

    #looking for a specific hostname
    #
    hostname = ""
    wait_for_hostname = args.hostname

    #watching for CDP-Packets from this host on a specific interface
    #the router-IP should use a directly-connected IP-Address
    ip = "0.0.0.0"
    wait_for_connected = args.connected
    
    interface=args.interface
    networks = get_connected(interface)
    #print(networks) 

    #CDP
    capturefilter="ether dst 01:00:0c:cc:cc:cc"

    while not((hostname == wait_for_hostname) and (not(wait_for_connected) or is_IP_connected(ip,networks))):
      p=sniff(iface=interface, count=1, filter=capturefilter)
      pkt=p[0]
      #print("Packet received",pkt.show())

      #is this a CDP-Packet containing a hostname?
      if (CDPMsgDeviceID in pkt):
        #is this the CDP-Neighbor we're looking for?
        device=pkt["CDPMsgDeviceID"].val.decode()
        hostname=device.split(".")[0]
        #print("Hostname:",hostname)

        if (hostname == wait_for_hostname):
          #is this a CDP-Packet containing a management-IP-Address?
          if (CDPAddrRecordIPv4 in pkt):
            ip=pkt["CDPAddrRecordIPv4"].addr
            #print("IP-Address found:",ip)

    #return the IP-Address to the calling application or the CLI
    return ip

if __name__ == "__main__":
    print(main())