Cisco IOS Service-Containers: Run an x86-VM inside a Router (Part 4: Package the Service-VM into an OVA)

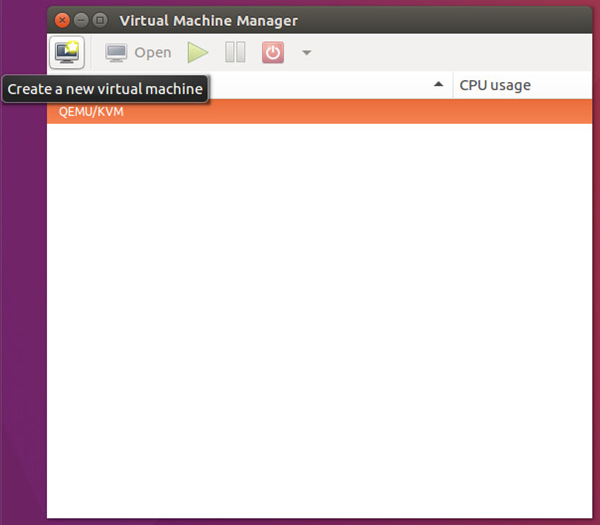
I’ll start at the KVM-Virtualization Host („Ubuntu Desktop“) again.

Folder Structure
I’ll create a folder „isr-service-container“ for common stuff (package.yaml, create_ova.sh) and a for each VM a dedicated sub-folder, today: „ubuntu-server16.04“

user@KVM-1:~$ mkdir isr-service-container
user@KVM-1:~$ cd isr-service-container
user@KVM-1:~/isr-service-container$ mkdir ubuntu-server16.04

Download the Cisco-provided „templates.tar“ from GitHub (GitHub: Templates.tar).
It contains:

  • package.yaml
  • create_ova.sh

Prepare a compressed virtual harddisk of the „Ubuntu-Server“-VM
Locate the original virtual harddisk:

user@KVM-1:~$ sudo ls /var/lib/libvirt/images/ -l
total 3238172
-rw------- 1 root root 21478375424 Feb  2 23:14 ubuntu-server16.04.qcow2

Convert the original „.qcow2“-File into a compressed „copy“:

user@KVM-1:~/isr-service-container$ sudo qemu-img convert -p -c -o compat=0.10 -O qcow2 /var/lib/libvirt/images/ubuntu-server16.04.qcow2 ./ubuntu-server16.04/ubuntu-server16.04.qcow2
    (100.00/100%)

user@KVM-1:~/isr-service-container$ cd ubuntu-server16.04/
user@KVM-1:~/isr-service-container/ubuntu-server16.04$ ls -lh
total 1,2G
-rw-r--r-- 1 root root 1,2G Feb  2 23:26 ubuntu-server16.04.qcow2

Change the Owner of this new file:

user@KVM-1:~/isr-service-container/ubuntu-server16.04$ sudo chown user:user ubuntu-server16.04.qcow2 
user@KVM-1:~/isr-service-container/ubuntu-server16.04$ ls -lh
total 1,2G
-rw-r--r-- 1 user user 1,2G Feb  2 23:26 ubuntu-server16.04.qcow2
user@KVM-1:~/isr-service-container/ubuntu-server16.04$ copy ../package.yaml ./package.yaml

I’ll change:

  • Description: „KVM Ubuntu 16.04 LTS“
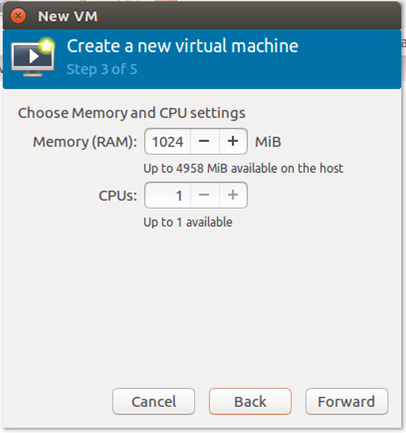
  • resources/vcpu: 1
  • disk/file: ubuntu-server16.04.qcow2

The vCPU# got decreased since the CSR1000v only supports Service-VMs with one vCPU.

user@KVM-1:~/isr-service-container/ubuntu-server16.04$ joe ./package.yaml
manifest-version: 1.0

info:
  name: ubuntu
  description: "KVM Ubuntu 16.04 LTS"
  version: 1.1

app:
  # Indicate app type (vm, paas, lxc etc.,)
  apptype: vm

  resources:
   cpu: 10
   memory: 854016
   vcpu: 1

   disk:
    - target-dev: hdc
      file: ubuntu-server16.04.qcow2

   interfaces:
    - target-dev: net1

   serial:
    - console
    - aux

  # Specify runtime and startup
  startup:
    runtime: kvm
    boot-dev: hd

Another File „version.ver“ has to be created:

  • the „version“ must match the „manifest-version“ of the yaml-file.
user@KVM-1:~/isr-service-container/ubuntu-server16.04$ echo 1.0 > version.ver

Check the content of the VM-folder

user@KVM-1:~/isr-service-container/ubuntu-server16.04$ ls -l
total 1206788
-rw-rw-r-- 1 user user        437 Feb  3 20:13 package.yaml
-rw-r--r-- 1 user user 1239148032 Feb  2 23:26 ubuntu-server16.04.qcow2
-rw-rw-r-- 1 user user          4 Feb  2 23:33 version.ver

Create the OVA-File

user@KVM-1:~/isr-service-container/ubuntu-server16.04$ cd ..

user@KVM-1:~/isr-service-container$ ./create_ova.sh -mts 200000 -mfs 100000 ubuntu-server16.04
create_ova.sh v1.0(Linux) - Create a virtual-service OVA package

User inputs:
  Compress=(files > '100000M' if total 
            file size > '200000M')
  Directory=ubuntu-server16.04

Package name :  ubuntu
 Generating SHA1 on files...
Running SHA1 over all files in '/home/user/isr-service-container/ubuntu-server16.04' and
    creating manifest file ' ubuntu.mf', please wait...

Done creating ' ubuntu.mf' file
 ...Done Generating SHA1 on files
Creating ' ubuntu.ova' please wait...
package.yaml
ubuntu.mf
ubuntu-server16.04.qcow2
version.ver

'/home/user/isr-service-container/ubuntu-server16.04/ ubuntu.ova' created

Manifest Contents:
SHA1(package.yaml)= fb47cf5b764a7bb062561a4f67d830003f8e4d5a  
SHA1(ubuntu-server16.04.qcow2)= 732c8ac9dc81ab6b2695fe6c045bec4493d77168  
SHA1(version.ver)= 61652cd1568dcf2614df833eba241755eee34e89  

Copy the OVA-File to the Router:

user@KVM-1:~/isr-service-container$ scp ./ubuntu-server16.04/ubuntu.ova <ios-user>@<csr1000v-management-router-ip>:bootflash:ubuntu1604.ova
Password: <ios-password>
ubuntu.ova                                                                                         100% 1182MB   1.2MB/s   17:05    
Connection to 192.168.2.189 closed by remote host.

Check the ISR-Router:

SERVICECONTAINER#dir *.ova

Directory of bootflash:/
   22  -rw-  1239152640   Feb 3 2018 19:00:42 +00:00  ubuntu1604.ova
7897796608 bytes total (4507389952 bytes free)

Cisco IOS Service-Containers: Run an x86-VM inside a Router (Part 3: Create the Service-VM)

Create the „Ubuntu Server“-VM using KVM on top of the „Ubuntu Desktop“-VM
Run the „Virtual Machine Manager“

Virtual Machine Manager

Create a new virtual Machine:
Virtual Machine Manager – create a new VM

(1) Create a new virtual Machine

vmm – 1 – Create a new virtual machine

(2) Select the Installation ISO
* and deselect „auto OS Detection“

vmm – 2 – Use ISO Image

(3) Choose Memory and CPU Settings

vmm – 3 – Choose Memory and CPU settings

(4) Create a virtual Hard-Disk for the VM

vmm – 4 – Enable storage for this VM

(5) Give a name to the VM

vmm – 5 – Ready to begin the installation

Boot the KVM-VM („Ubuntu Server“)

0 – install Ubuntu Server

Basic Setup:

  • Language: Englisch
  • my territory: other/Europe/Germany
  • locale: en_US.UTF_8
  • Keyboard: German
  • hostname: ubuntu-server
  • user / password
  • no home-directory encryption
  • timezone Europe/Berlin
  • use entire virtual disk (no need for „LVM…“ i think)
  • no HTTP-Proxy
  • no automatic updates
  • [x] SSH-Server
  • install GRUB

After the first login, as always:
sudo apt-get update && sudo apt-get upgrade –y
sudo reboot

Enable the Virtual-„Console“-Port of the Ubuntu-Server-VM

  • enable a virtual „CON“ serial-port at the linux vm

sudo joe /lib/systemd/system/ttyS0.service

Example-Script for the 16.04 System-CTL Service:

[Unit]
Description=Serial Console Service

[Service]
ExecStart=/sbin/getty -L 9600 ttyS0 vt102
Restart=always

[Install]
WantedBy=multi-user.target

Reload systemctl, enable the TTY-service and then start it:

sudo systemctl daemon-reload
sudo systemctl enable ttyS0
sudo systemctl start ttyS0

Verify the service state:
user@ubuntu-server:~$ sudo systemctl status ttyS0
● ttyS0.service - Serial Console Service
Loaded: loaded (/lib/systemd/system/ttyS0.service; enabled; vendor preset: en
Active: active (running) since Sat 2018-02-03 20:21:20 CET; 1h 19min ago
Main PID: 831 (login)
Tasks: 0
Memory: 672.0K
CPU: 196ms
CGroup: /system.slice/ttyS0.service
‣ 831 /bin/login --

Add your „Network Application“ to the VM:
I want to use my Service-Container for network-management (Centralized access to device-configuration and other state-information using NAPALM and Linux: SNMP with Python ):
sudo apt-get install -y joe
sudo apt-get install –y libsnmp-dev snmp-mibs-downloader
sudo apt-get install –y gcc python-dev python-pip libssl-dev libffi-dev python-cffi
pip install easysnmp
pip install napalm

That’s all
Shutdown the VM

Cisco IOS Service-Containers: Run an x86-VM inside a Router (Part 2: Create a CSR1000v-Instance with nested Virtualization support)

In real life an hardware-ISR/ASR-Router might be the correct choice.

Create a CSR1000v-Instance with nested Virtualization support
But since the CSR1000v-Router supports Service-Containers, too – this is the chance to prove the setup in a lab environment:

  • IOS-XE 3.17 is the first supported release, i’ll go with IOS-XE 16.7.1
  • Option to enable unsigned containers
  • any 3rd party KVM
  • Libvirt based format / YAML manifest file
  • Requires 4GB+ dedicated RAM
  • ASR1000, ISR4000, CSR1000

5 Minutes to deploy the virtual CSR1000v-Router using COT
I’ll use COT (Common OVF Tool (COT) – Automated Lab-Router Deployment) to deploy my CSR1000v-Router:

user@ubuntu-server:~$ cot inject-config csr1000v-universalk9.16.07.01.ova -c ios-napalm.startup.cfg -o csr1000v-universalk9.16.07.01.napalm.ova
Add disk file to existing (but empty) cdrom drive? [y]
NOTICE  : Overwriting existing disk Item in OVF

cot --verbose deploy csr1000v-universalk9.16.07.01.napalm.ova esxi &amp;amp;amp;lt;VCENTER-HOST/IP&amp;amp;amp;gt;/&amp;amp;amp;lt;DATACENTER&amp;amp;amp;gt;/host/&amp;amp;amp;lt;ESXi-HOST/IP&amp;amp;amp;gt; -u &amp;amp;amp;lt;USER&amp;amp;amp;gt; -p &amp;amp;amp;lt;PASS&amp;amp;amp;gt; -n RTR-SERVICE-CONTAINER -d &amp;amp;amp;lt;DATASTORE&amp;amp;amp;gt; -S "telnet://:41001,server" -N GigabitEthernet1="Management" GigabitEthernet2=T24 GigabitEthernet3=T34 -c 2CPU-8GB

Boot the Router
Check the Virtualization-Environment: fail 🙁

  • Machine types disabled : KVM
SERVICECONTAINER# show virtual-service
Virtual Service Global State and Virtualization Limits:

Infrastructure version : 1.7
Total virtual services installed : 0
Total virtual services activated : 0

Machine types supported   : LXC
Machine types disabled    : KVM

Maximum VCPUs per virtual service : 1
Resource virtualization limits:
Name                         Quota     Committed     Available
--------------------------------------------------------------
system CPU (%)                  75             0            75
memory (MB)                   3072             0          3072
bootflash (MB)               20000             0          5554

i forgot to enable nested-virtualization for the CSR1000v-Router-VM.

Action Plan

    • Power-down the VM („Shut Down Guest“) again
    • edit Hardware (Web-Client)
csr1000v-router-enable-nested-virtualization
  • boot the router again

Check again: works 🙂

  • Machine types supported : KVM, LXC
SERVICECONTAINER#show virtual-service
Virtual Service Global State and Virtualization Limits:

Infrastructure version : 1.7
Total virtual services installed : 0
Total virtual services activated : 0

Machine types supported   : KVM, LXC
Machine types disabled    : none

Maximum VCPUs per virtual service : 1
Resource virtualization limits:
Name                         Quota     Committed     Available
--------------------------------------------------------------
system CPU (%)                  75             0            75
memory (MB)                   3072             0          3072
bootflash (MB)               20000             0          5553

That’s it, the CSR1000V is ready.

Notice: vCPU-Limitation in CSR1000v

  • Maximum VCPUs per virtual service : 1

Remember this, when creating the YAML-File for the OVA. (Part 4: Package the Service-VM into an OVA)

Cisco IOS Service-Containers: Run an x86-VM inside a Router (Part 1: KVM Development Environment)

Network Hosted Kernel Virtual Machine (KVM)

Many Cisco Routers allow you to host your own virtual machine directly inside a router.
DevNet: Cisco IOS KVM Service-Containers

  • CSR 1000v
  • ISR 4000
  • ASR 1000

I went through the documentation, especially Service-Containers-Tutorial.pdf and Ubuntu – Building a Service Container.pdf where very helpful.

But i didn’t want to go the „Ubuntu-Desktop-14.04-LTS“-way which was described.

„My“ Service-Container-VM should be:

  • Ubuntu 16.04 LTS
  • Ubuntu Server
    • save some compute/cpu/dram/harddisk-ressources by not installing an Ubuntu-Desktop-Environment inside the Router. Just network services, please!

The whole deployment process can be accomplished in five steps:

  1. build a KVM virtualization-Environment
  2. prepare an ISR-Router (lab: Create a CSR1000v-Instance for nested Virtualization)
  3. create the Service-VM (Ubuntu-Server)
  4. package it inside an OVA
  5. install this OVA at the router

Build the KVM Virtualization Environment

Here I’ll use Ubuntu LTS, but the „Desktop“-Release to get the „Virtual Machine Manager“-GUI.
ubuntu-16.04.3-desktop-amd64.iso

Common vSphere Process „New VM“

  • Linux Ubuntu 64 Bit, 4GB DRAM, 120GB Disk
  • mount Ubuntu-Desktop-ISO as DVD

Enable nested virtualization (Hardware-Virtualization for Guest-OS)
Don’t forget: this „KVM Virtualization Environment“ will run on top of an VSphere-ESXi-Host.

  • nested virtualization: [Linux-Server-VM] on top of [KVM Virtualization] on top of [ESXi Hypervisor]
Hardware virtualization: [x] Expose hardware assisted virtualization to guest-OS

Ubuntu-Desktop VM with KVM-Virtualization
Installation: Defaults are fine

  • never use the „root“-acccout
  • use a common user-account instead, i’ll use the username „user“ in the text

Additional Setup
user@KVM-1:~$ sudo apt-get update && sudo apt-get upgrade -y
user@KVM-1:~$ sudo apt-get install -y open-vm-tools open-vm-tools-desktop

Add KVM („libvirt“)
user@KVM-1:~$ sudo apt-get install -y qemu-kvm libvirt-bin bridge-utils virt-manager qemu-system
Finalize it
user@KVM-1:~$ sudo reboot

Check the KVM Environment
Should look like this:

user@KVM-1:~/isr-service-container$ virsh -c qemu:///system list

 Id    Name                           State
----------------------------------------------------

Fine-tuning: „Disable Screensaver“

  • avoid ever and ever re-login to the remote-Desktop
  • acceptable in an isolated lab environment

all settings => brightness & lock

  • „never“ turn screen off when inactive
  • lock „off“
  • [ ] require password when waking from suspend

Preparation: Mount NFS-Share with „ubuntu-server“-ISO
I store my ISO-Images on an central NFS-Datastore.

  • the ISO-image has to be available inside the VM
sudo apt-get install -y nfs-common
mkdir /home/user/<NAS-SHARE>
sudo mount.nfs <NAS-IP>:<NAS-SHARE> /home/user/<NAS-SHARE>

Cisco CSR1000v – additional Interfaces? Common OVF Tool (COT)!

Routers with more than three interfaces? Not that uncommon!
It might be handy, if several devices are needed with more than three interfaces, to:

  • not:
    • deploy the devices with three interfaces first
    • add the needed number of interfaces to the routers
    • attache tne new interfaces to the correct vSphere-Portgroup
  • but instead:
    • create an OVA-Template with the correct number of interfaces (one time)
    • deploy the routers and attach them during deployment to their portgroup

So using vNIC Hot-Add might be not the favourite way to work.

Common OVF Tool
COT lets you to deploy Cisco CSR1000v routers by easy to use (linux-)commands.
(Common OVF Tool (COT) – Automated Lab-Router Deployment
This is my original OVA-file already containing some basic configurations needed for NAPALM.

  • it will build a virtual router with three GigabitEthernet-Interfaces
user@ubuntu-server:~$ cot info csr1000v-universalk9.16.03.05.napalm.ova | egrep "(Networks|Gigabit)"
Networks:
  GigabitEthernet1  "Data network 1"
  GigabitEthernet2  "Data network 2"
  GigabitEthernet3  "Data network 3"
NICs and Associated Networks:
  GigabitEthernet1 : GigabitEthernet1
  GigabitEthernet2 : GigabitEthernet2
  GigabitEthernet3 : GigabitEthernet3
  Management Interface                                    "GigabitEthernet1"

Add another Interface (long version)
Let’s use the prepared OVA and create another OVA with 4 interfaces:

user@ubuntu-server:~$ cot edit-hardware csr1000v-universalk9.16.03.05.napalm.ova -o csr1000v-universalk9.16.03.05.napalm.4IF.ova -n 4 --nic-type vmxnet3 --nic-networks "GigabitEthernet1" "GigabitEthernet2" "GigabitEthernet3" "GigabitEthernet4" --network-descriptions "Data network 1" "Data network 2" "Data network 3" "Data network 4"
Network GigabitEthernet4 is not currently defined. Create it? [y] y

Result:

user@ubuntu-server:~$ cot info csr1000v-universalk9.16.03.05.napalm.4IF.ova | egrep "(Networks|Gigabit)"
Networks:
  GigabitEthernet1  "Data network 1"
  GigabitEthernet2  "Data network 2"
  GigabitEthernet3  "Data network 3"
  GigabitEthernet4  "Data network 4"
NICs and Associated Networks:
  GigabitEthernet1 : GigabitEthernet1
  GigabitEthernet2 : GigabitEthernet2
  GigabitEthernet3 : GigabitEthernet3
  GigabitEthernet4 : GigabitEthernet4
  Management Interface                                    "GigabitEthernet1"

Add another Interface (short version)
It’s possible to replace the long enumerations („GigabitEthernet1“ „GigabitEthernet2“ „GigabitEthernet3“ „GigabitEthernet4“) by a macro „GigabitEthernet{1}“ => the Variable {1} will get expanded to 1…2…3…4…up to the number needed. This is much more flexible when sometimes 4, sometimes 5 NICs need to be added.

user@ubuntu-server:~$ cot edit-hardware csr1000v-universalk9.16.03.05.napalm.ova -o csr1000v-universalk9.16.03.05.napalm.4IFb.ova -n 4 --nic-type vmxnet3 --nic-networks "GigabitEthernet{1}" --network-descriptions "Data network {1}"
Network GigabitEthernet4 is not currently defined. Create it? [y]

Same result as before:

user@ubuntu-server:~$ cot info csr1000v-universalk9.16.03.05.napalm.4IFb.ova | egrep "(Networks|Gigabit)"
Networks:
  GigabitEthernet1  "Data network 1"
  GigabitEthernet2  "Data network 2"
  GigabitEthernet3  "Data network 3"
  GigabitEthernet4  "Data network 4"
NICs and Associated Networks:
  GigabitEthernet1 : GigabitEthernet1
  GigabitEthernet2 : GigabitEthernet2
  GigabitEthernet3 : GigabitEthernet3
  GigabitEthernet4 : GigabitEthernet4
  Management Interface                                    "GigabitEthernet1"

Deploy a new Router-VM using this OVA

user@ubuntu-server:~$ cot --verbose deploy csr1000v-universalk9.16.03.05.napalm.4IFb.ova esxi VCENTERIP/Datacenter/host/ESXiIP -u VCENTER-USER -p PASS -n CSR-4IF -d "DS-LAB" -S "telnet://:44444,server" -N GigabitEthernet1="Management" GigabitEthernet2=T24 GigabitEthernet3=T34 GigabitEthernet4=TBB -c 1CPU-4GB
INFO    : vm_description  : Loading 'csr1000v-universalk9.16.03.05.napalm.4IFb.ova' as OVF
INFO    : ovf             : OVF version is 1.x
INFO    : ovf             : OVF product class com.cisco.csr1000v --> platform Cisco CSR1000V
INFO    : vm_description  : Successfully loaded OVF from csr1000v-universalk9.16.03.05.napalm.4IFb.ova
WARNING : deploy          : No serial connectivity information is available for 1 serial port(s) - they will not be created or configured.
INFO    : deploy_esxi     : Deploying VM...
NOTICE  : helper          : Calling 'ovftool --deploymentOption=1CPU-4GB --net:GigabitEthernet1=Management --net:GigabitEthernet2=T24 --net:GigabitEthernet3=T34 --net:GigabitEthernet4=TBB --name=CSR-4IF --datastore=DS-LAB csr1000v-universalk9.16.03.05.napalm.4IFb.ova vi://administrator@lab.local:VMware1!@192.168.2.13/Datacenter/host/192.168.2.12'...
Opening OVA source: csr1000v-universalk9.16.03.05.napalm.4IFb.ova
The manifest validates
Opening VI target: vi://administrator%40lab.local@192.168.2.13:443/Datacenter/host/192.168.2.12
Deploying to VI: vi://administrator%40lab.local@192.168.2.13:443/Datacenter/host/192.168.2.12
Transfer Completed
Completed successfully
NOTICE  : helper          : ...done
INFO    : deploy_esxi     : FIXING up serial ports on deployed VM...
INFO    : deploy_esxi     : Serial port will be a telnet server at :44444
INFO    : deploy_esxi     : Done with serial port fixup

Isn’t it beautiful?

edit Hardware“: 4x GigabitEthernet-Interfaces

Test the created CSR1000v-Router
The forth GigabitEthernet-Interface was detected during hardware-setup:

NAPALM-1#show ip int brief
Interface              IP-Address      OK? Method Status                Protocol
GigabitEthernet1       192.168.2.244   YES DHCP   up                    up
GigabitEthernet2       unassigned      YES unset  administratively down down
GigabitEthernet3       unassigned      YES unset  administratively down down
GigabitEthernet4       unassigned      YES unset  administratively down down

The Interface works fine:

NAPALM-1#conf t
Enter configuration commands, one per line.  End with CNTL/Z.
NAPALM-1(config)#int gig 4
NAPALM-1(config-if)#ip addr 192.168.64.99 255.255.255.0
NAPALM-1(config-if)#end

NAPALM-1#ping 192.168.64.1
Type escape sequence to abort.
Sending 5, 100-byte ICMP Echos to 192.168.64.1, timeout is 2 seconds:
.!!!!
Success rate is 80 percent (4/5), round-trip min/avg/max = 2/3/4 ms

Common OVF Tool (COT) – Automated Lab-Router Deployment

Is this SDN (Software defined Networking)? I think so!
I really love to provision new Cisco CSR1000v lab-routers without the need to do everything manually in the graphical user interface.

It’s possible to provision production-routers, too, of course: Just add your license-information to leave the 100Kbps-limit behind (which is no handicap for normal lab-usage).

The Common OVF Tool (COT) (Documentation) enables me to do this by injecting an initial startup-configuration into the cisco-provided OVA-file before deploying it to an ESXi-host.
Interactive Cisco CLI-Commands possible
And, even better, the Cisco CSR1000V allows interactive CLI-commands within the injected configuration:

  • building new bootflash-directories,
  • creating a SSH-key.

Injecting the bootstrap-config

$ cot --version
Common OVF Tool (COT), version 2.0.3
Copyright (C) 2013-2017 the COT project developers.

$ cot inject-config csr1000v-universalk9.03.16.06b.S.155-3.S6b-ext.ova -c ios-napalm.startup.cfg -o csr1000v-universalk9.03.16.06b.S.155-3.S6b-ext.napalm.ova

This is an example-config setting parameters needed for napalm:
Centralized access to device-configuration and other state-information using NAPALM
Automated RMON Alarm/Event-configuration for class-based QoS-Monitoring using NAPALM

!
hostname NAPALM-1
ip domain-name lab.local
!
no ip domain-lookup
!
crypto key generate rsa modulus 2048
!
username rmond privilege 15 secret rmondpass
!
platform console serial
!
vrf definition MGMT
  address-family ipv4
!
int gig 1
  descr mgmt0
  vrf forwarding MGMT
  ip address dhcp
  no shut
!
ip scp server enable
!
ip access-list standard ACL_SNMP
    permit host 192.168.2.89
!
snmp-server community READ ro ACL_SNMP
snmp-server location allones.de
!
file prompt quiet
!
do mkdir bootflash:/ARCHIVE
archive
  path bootflash:/ARCHIVE/bak
!
line vty 0 4
  login local
  transport input ssh
!
end

Deploy the CSR1000V-Router
One command to deploy the router

  • at an ESXi-Host/vSphere-Datacenter
  • using a defined Datastore
  • creating an serial-port (not really needed since SSH is running immedeately)
  • place the three NICs of this router at the desired vSwitch-Portgroups

Those vSwitch-Portgroups have been created using vSphere-CLI.

$ cot --verbose deploy csr1000v-universalk9.03.16.06b.S.155-3.S6b-ext.napalm.ova esxi //host/ -u -p -n RTR-NAPALM-1 -d -S "telnet://:31001,server" -N GigabitEthernet1="Management" GigabitEthernet2=T24 GigabitEthernet3=T34 -c 1CPU-4GB

SSH-Access to the router

NAPALM-1# show ssh
Connection Version Mode Encryption  Hmac         State                 Username
0          2.0     IN   aes256-ctr  hmac-sha1    Session started       rmond
0          2.0     OUT  aes256-ctr  hmac-sha1    Session started       rmond
%No SSHv1 server connections running.

NAPALM-1#who
    Line       User       Host(s)              Idle       Location
*  1 vty 0     rmond      idle                 00:00:00 192.168.2.312

NAPALM-1#cd bootflash:ARCHIVE
NAPALM-1#pwd
bootflash:/ARCHIVE/

NAPALM-1#show crypto key mypubkey all
Key name: NAPALM-1.lab.local
Key type: RSA KEYS
 Storage Device: private-config
 Usage: General Purpose Key
 Key is not exportable. Redundancy enabled.
 Key Data:
  30820222 300D0609 2A864886 F70D0101 01050003 82020F00 3082020A 02820201
  ...
  70F5FE1C 01BE930D B3C84841 AC46EE0D 451DC530 55F28B9C 82796E8F 1B5F5163
  57020301 0001

NAPALM-1#show ip int brief
Interface              IP-Address      OK? Method Status                Protocol
GigabitEthernet1       192.168.2.135   YES DHCP   up                    up
GigabitEthernet2       unassigned      YES unset  administratively down down
GigabitEthernet3       unassigned      YES unset  administratively down down

NAPALM-1#show ip route vrf MGMT
Routing Table: MGMT
Gateway of last resort is 192.168.2.1 to network 0.0.0.0

S*    0.0.0.0/0 [254/0] via 192.168.2.1
      192.168.2.0/24 is variably subnetted, 3 subnets, 2 masks
C        192.168.2.0/24 is directly connected, GigabitEthernet1
S        192.168.2.1/32 [254/0] via 192.168.2.1, GigabitEthernet1
L        192.168.2.315/32 is directly connected, GigabitEthernet1

Automated RMON Alarm/Event-configuration for class-based QoS-Monitoring using NAPALM

In Configure RMON Alarms&Events by script I’ve shown a short python-algorithm to to discover all Cisco class-based QoS (cbQoS) packet-/drop-counters and to generate RMON-alarms for each. The router monitors these counters every 300s, calculates the delta for the interval and raises RMON-events when there were packets/drops or when the have been before but not anymore.

This RMON-event has been configured as an syslog-message to an syslog-receiver etc.

The existing script just generated a list of cli-commands which had to be entered manually to the router-config.
Not a valid aproach when having hundreds devices to be configured.

Now i want the script to automatically configure the router.

  • add both „rmon event“-objects for the rising- and the falling-threshold of the monitored alarms
  • read the existing „rmon alarm“-objects from the device config, which have been configured by this script during a former run
  • remove these existing alarms
  • discover all cbQoS-packet/drop-counters
  • add corresponding „rmon alarm“-objects

I’d like to refer to Centralized access to device-configuration and other state-information using NAPALM for some basic information regarding NAPALM and how to create the „router“-object in python.

NAPALM: Read existing RMON alarms.
I’ll use the following python-logic to

  • remote-execute the command
  • immedeately pull the cli-output out of the python-dictionary: the CLI-Command is the dict-key
>>> cligetrmon=['show rmon alarms | inc RMONevent']
>>> rmonalarms = router.cli(cligetrmon)[cligetrmon[0]]
>>> print rmonalarms
Alarm 10001 is active, owned by RMONevent

Generate CLI to delete these RMON alarms

>>> cmdnormon = ""
>>> for alarm in rmonalarms.split('\n'):
...  alarmid = alarm.split(' ')[1]
...  cmdnormon += "no rmon alarm "+alarmid+"\n"
...
>>>
>>> print cmdnormon
no rmon alarm 10001

Static CLI to add required RMON events

>>> cmdrmonevent = "rmon event 10 log owner RMONevent\n"
>>> cmdrmonevent += "rmon event 11 log owner RMONevent\n"

Read Cisco cbQoS-MIB to fetch interesting QoS-counters, generate CLI for RMON-alarms

>>> from easysnmp import Session
>>> hostname = "192.168.2.72"
>>> session = Session(hostname, community='READ', version=2)
>>>
... cbqos = session.walk('1.3.6.1.4.1.9.9.166.1.15.1.1.13')
>>>
... cmdrmon = ""
>>> alarmID = 10001
>>>
... for i in cbqos:
...   oidList=i.oid.split(".")
...   q=oidList.pop()
...   p=oidList.pop()
...   #print p,q
...   ifTypeID=int(session.get("1.3.6.1.4.1.9.9.166.1.1.1.1.2."+p).value)
...   ifDirID=int(session.get("1.3.6.1.4.1.9.9.166.1.1.1.1.3."+p).value)
...   if (ifDirID==2):
...     cmdrmon += "rmon alarm "+str(alarmID)+" "+i.oid+" 300 delta rising-threshold 1 11 falling-threshold 0 10 owner RMONevent\n"
...   alarmID += 1
...

Concatenate all commmands

>>> cmd = cmdrmonevent+cmdnormon+cmdrmon
>>> print cmd
rmon event 10 log owner RMONevent
rmon event 11 log owner RMONevent
no rmon alarm 10001
rmon alarm 10001 iso.3.6.1.4.1.9.9.166.1.15.1.1.13.18.65536 300 delta rising-threshold 1 11 falling-threshold 0 10 owner RMONevent
rmon alarm 10002 iso.3.6.1.4.1.9.9.166.1.15.1.1.13.18.131072 300 delta rising-threshold 1 11 falling-threshold 0 10 owner RMONevent
rmon alarm 10003 iso.3.6.1.4.1.9.9.166.1.15.1.1.13.18.196608 300 delta rising-threshold 1 11 falling-threshold 0 10 owner RMONevent
rmon alarm 10004 iso.3.6.1.4.1.9.9.166.1.15.1.1.13.34.65536 300 delta rising-threshold 1 11 falling-threshold 0 10 owner RMONevent
rmon alarm 10005 iso.3.6.1.4.1.9.9.166.1.15.1.1.13.34.131072 300 delta rising-threshold 1 11 falling-threshold 0 10 owner RMONevent
rmon alarm 10006 iso.3.6.1.4.1.9.9.166.1.15.1.1.13.34.196608 300 delta rising-threshold 1 11 falling-threshold 0 10 owner RMONevent

Push the commands to the Router

>>> router.load_merge_candidate(config=cmd)

Check the differences befor apply the changes

>>> print router.compare_config()
-no rmon alarm 10001
+rmon alarm 10001 iso.3.6.1.4.1.9.9.166.1.15.1.1.13.18.65536 300 delta rising-threshold 1 11 falling-threshold 0 10 owner RMONevent
+rmon alarm 10002 iso.3.6.1.4.1.9.9.166.1.15.1.1.13.18.131072 300 delta rising-threshold 1 11 falling-threshold 0 10 owner RMONevent
+rmon alarm 10003 iso.3.6.1.4.1.9.9.166.1.15.1.1.13.18.196608 300 delta rising-threshold 1 11 falling-threshold 0 10 owner RMONevent
+rmon alarm 10004 iso.3.6.1.4.1.9.9.166.1.15.1.1.13.34.65536 300 delta rising-threshold 1 11 falling-threshold 0 10 owner RMONevent
+rmon alarm 10005 iso.3.6.1.4.1.9.9.166.1.15.1.1.13.34.131072 300 delta rising-threshold 1 11 falling-threshold 0 10 owner RMONevent
+rmon alarm 10006 iso.3.6.1.4.1.9.9.166.1.15.1.1.13.34.196608 300 delta rising-threshold 1 11 falling-threshold 0 10 owner RMONevent

Verify the pushed commands at the router-CLI

IOS-RTR#dir *.txt
Directory of bootflash:/*.txt

Directory of bootflash:/

   21  -rw-         898  Nov 24 2017 15:05:32 +00:00  merge_config.txt
7835619328 bytes total (6613028864 bytes free)

IOS-RTR#more merge_config.txt
rmon event 10 log owner RMONevent
rmon event 11 log owner RMONevent
no rmon alarm 10001
rmon alarm 10001 iso.3.6.1.4.1.9.9.166.1.15.1.1.13.18.65536 300 delta rising-threshold 1 11 falling-threshold 0 10 owner RMONevent
rmon alarm 10002 iso.3.6.1.4.1.9.9.166.1.15.1.1.13.18.131072 300 delta rising-threshold 1 11 falling-threshold 0 10 owner RMONevent
rmon alarm 10003 iso.3.6.1.4.1.9.9.166.1.15.1.1.13.18.196608 300 delta rising-threshold 1 11 falling-threshold 0 10 owner RMONevent
rmon alarm 10004 iso.3.6.1.4.1.9.9.166.1.15.1.1.13.34.65536 300 delta rising-threshold 1 11 falling-threshold 0 10 owner RMONevent
rmon alarm 10005 iso.3.6.1.4.1.9.9.166.1.15.1.1.13.34.131072 300 delta rising-threshold 1 11 falling-threshold 0 10 owner RMONevent
rmon alarm 10006 iso.3.6.1.4.1.9.9.166.1.15.1.1.13.34.196608 300 delta rising-threshold 1 11 falling-threshold 0 10 owner RMONevent

Commit the changes

>>> router.commit_config()

Or discard them

>>> router.discard_config()

It’s possible to rollback committed changes.

>>> router.rollback()

Finally: Disconnect the session with the device

>>> router.close()

Again: A brief look to the router

IOS-RTR#show run | inc rmon
! Last configuration change at 19:08:59 UTC Fri Nov 24 2017 by rmond
! NVRAM config last updated at 19:09:00 UTC Fri Nov 24 2017 by rmond
username rmond privilege 15 secret 5 $1$7VnE$2O18Vfcr4y7eO5gY7l4xx1
rmon event 10 log owner RMONevent
rmon event 11 log owner RMONevent
rmon alarm 10001 cbQosCMStatsEntry.13.18.65536 300 delta rising-threshold 1 11 falling-threshold 0 10 owner RMONevent
rmon alarm 10002 cbQosCMStatsEntry.13.18.131072 300 delta rising-threshold 1 11 falling-threshold 0 10 owner RMONevent
rmon alarm 10003 cbQosCMStatsEntry.13.18.196608 300 delta rising-threshold 1 11 falling-threshold 0 10 owner RMONevent
rmon alarm 10004 cbQosCMStatsEntry.13.34.65536 300 delta rising-threshold 1 11 falling-threshold 0 10 owner RMONevent
rmon alarm 10005 cbQosCMStatsEntry.13.34.131072 300 delta rising-threshold 1 11 falling-threshold 0 10 owner RMONevent
rmon alarm 10006 cbQosCMStatsEntry.13.34.196608 300 delta rising-threshold 1 11 falling-threshold 0 10 owner RMONevent
IOS-RTR#

It’s already written to NVRAM

IOS-RTR#show startup-config | inc rmon
! Last configuration change at 19:08:59 UTC Fri Nov 24 2017 by rmond
! NVRAM config last updated at 19:09:00 UTC Fri Nov 24 2017 by rmond
username rmond privilege 15 secret 5 $1$7VnE$2O18Vfcr4y7eO5gY7l4xx1
rmon event 10 log owner RMONevent
rmon event 11 log owner RMONevent
rmon alarm 10001 cbQosCMStatsEntry.13.18.65536 300 delta rising-threshold 1 11 falling-threshold 0 10 owner RMONevent
rmon alarm 10002 cbQosCMStatsEntry.13.18.131072 300 delta rising-threshold 1 11 falling-threshold 0 10 owner RMONevent
rmon alarm 10003 cbQosCMStatsEntry.13.18.196608 300 delta rising-threshold 1 11 falling-threshold 0 10 owner RMONevent
rmon alarm 10004 cbQosCMStatsEntry.13.34.65536 300 delta rising-threshold 1 11 falling-threshold 0 10 owner RMONevent
rmon alarm 10005 cbQosCMStatsEntry.13.34.131072 300 delta rising-threshold 1 11 falling-threshold 0 10 owner RMONevent
rmon alarm 10006 cbQosCMStatsEntry.13.34.196608 300 delta rising-threshold 1 11 falling-threshold 0 10 owner RMONevent

Centralized access to device-configuration and other state-information using NAPALM

Since I still want to build a centralized solution for automated configuration of RMON-alarms to monitor Cisco cbQoS-packet/drop-counters a solution to retrieve and modify device configurations was needed.

The NAPALM (Network Automation and Programmability Abstraction Layer with Multivendor support) Framework seems to provide the required features.
NAPALM Installation
Some NAPALM-IOS dependencies have to be fulfilled first.

sudo apt-get install -y --force-yes libssl-dev libffi-dev python-dev python-cffi

The „partial installation“ seems to be not working anymore, the full installation uses some KB more ressources, not worth to think about the partial installation…

pip install napalm

IOS Preperation
To allow remote-access to the centralized NAPALM server these features need to be enabled in each IOS device:

  • Remote-Access via SSH,
  • SCP (Secure Copy),
  • the IOS „Archive“-feature is the foundation of NAPALM config-operations.
IOS-RTR#conf t
Enter configuration commands, one per line.  End with CNTL/Z.

! AAA preferred for production-systems, of course
IOS-RTR(config)#username rmond privilege 15 secret rmondpass

! required
IOS-RTR(config)#ip scp server enable

! no annoying [yes/no]-prompts for file-operations anymore
IOS-RTR(config)#file prompt quiet

! create the folder in the filesystem for the Archive
IOS-RTR(config)#do mkdir bootflash:/ARCHIVE

IOS-RTR(config)#archive
IOS-RTR(config-archive)#path bootflash:/ARCHIVE/bak-

Explore Napalm

Go the the python shell:

user@snmp-server:~$ python
>>> import napalm
>>> iosdriver = napalm.get_network_driver('ios')

Autodiscovery of the router-filesystem doesn’t work, i know the filesystem of my router and pass it as „optional argument“ to router-object.
*** todo: troubleshoot/fix the autodiscovery ***

>>> router = iosdriver(hostname='192.168.2.72', username='rmond',  password='rmondpass', 
optional_args={'port': 22, 'dest_file_system': 'bootflash:'})
>>> router.open()

Go to the router cli-shell:

  • user „rmond“ is logged in
IOS-RTR#who
    Line       User       Host(s)              Idle       Location
*  1 vty 0     user       idle                 00:00:00 192.168.2.109
   2 vty 1     rmond      idle                 00:00:02 192.168.2.89

Back to python, try some NAPALM-functions.

>>> print router.get_facts()
{u'os_version': u'CSR1000V Software (X86_64_LINUX_IOSD-UNIVERSALK9-M), Version 15.4(2)S3, RELEASE SOFTWARE (fc2)', 
u'uptime': 657600, u'interface_list': [u'GigabitEthernet1', u'GigabitEthernet2', u'GigabitEthernet3'], u'vendor': u'Cisco', 
u'serial_number': u'afdökjl0123', u'model': u'CSR1000V', u'hostname': u'IOS-RTR', u'fqdn': u'IOS-RTR.lab.local'}

Execute interactive EXEC-Commands.

>>> cliping=['ping 192.168.2.1']
>>> print router.cli(cliping)
{'ping 192.168.2.1': u'Type escape sequence to abort.\n
Sending 5, 100-byte ICMP Echos to 192.168.2.1, timeout is 2 seconds:\n!!!!!\n
Success rate is 100 percent (5/5), round-trip min/avg/max = 1/1/2 ms'}

Fetch the current running-config.

>>> clishowrun=['show running-config']
>>> print router.cli(clishowrun)
{'show running-config': u'Building configuration...\n\nCurrent configuration : 2411 bytes\n!\n
! Last configuration change at 12:52:32 UTC Fri Nov 24 2017 by user\n! NVRAM config last updated at 10:24:26 UTC Fri Nov 24 2017 by user\n!\n
version 15.4\nservice timestamps debug datetime msec\nservice timestamps log datetime msec\n
...rmon event 10 log owner RMONevent\nrmon event 11 log owner RMONevent\n
rmon alarm 10001 cbQosCMStatsEntry.2.18.65536 300 delta rising-threshold 1 11 falling-threshold 0 10 owner RMONevent\n
...
end'}

Read some lines from the running-config, filter using the pipe.

>>> cligetrmon=['show rmon alarms | inc RMONevent']
>>> print router.cli(cligetrmon)
{'show rmon alarms | inc RMONevent': u'Alarm 10001 is active, owned by RMONevent'}

Log-out if you are finished:

>>> router.close()

Linux: SNMPv3 with Python

Works out of the box.

  • if you’re fine with AES128-Encryption.

AES256 might not be a requirement in all cases, but having the opportunity to choose seems to be not absolutely absurd in 2017… Good news: The NetSNMP-AES192/256-patch is on the way.

EasySNMP installation and usage
I’d like to refer to Linux: SNMP with Python for the basics.

IOS-Config: VIEW/GROUP/USER
Take the opportunity and leverage SMP-Views to limit access to several SNMP-OIDs.

snmp-server view SV_EASYSNMP interfaces included
snmp-server view SV_EASYSNMP ciscoCdpMIB included
snmp-server view SV_EASYSNMP ciscoCBQosMIB included

ip access-list standard ACL_SNMP
 permit 192.168.2.89

snmp-server group SG_EASYSNMP v3 auth read SV_EASYSNMP access ACL_SNMP

snmp-server user EASYSNMP SG_EASYSNMP v3 auth sha AUTHPASS priv aes 128 PRIVPASS

EasySNMP: „Session“-Object with SNMPv3-Credentials
Find the official docs here: EasySNMP Session-API

Security level could be:

  • no_auth_or_privacy
    • If you want to use the user-based authentication without need for security
  • auth_without_privacy
    • Authentication only might be „good enough“ when traffic is fully kept within a management network
  • auth_with_privacy

Authentication-Procol:

  • MD5
  • SHA

Privacy-Protocol:

  • AES
    • AES128
  • DES, 3DES
    • For very outdated devices

Create the Session-Object

>>> session3 = Session(hostname='192.168.2.72', version=3,
security_level="auth_with_privacy", security_username="EASYSNMP",
auth_protocol="SHA", auth_password="AUTHPASS",
privacy_protocol="AES", privacy_password="PRIVPASS")

Use this „session“ as before.

>>> session3.walk("1.3.6.1.4.1.9.9.166.1.15.1.1.2")
[<SNMPVariable value='9' (oid='enterprises.9.9.166.1.15.1.1.2.18.65536', oid_index='',
snmp_type='COUNTER')>, <SNMPVariable value='0' (oid='enterprises.9.9.166.1.15.1.1.2.18.131072', oid_index='',
snmp_type='COUNTER')>, <SNMPVariable value='6039' (oid='enterprises.9.9.166.1.15.1.1.2.18.196608', oid_index='', snmp_type='COUNTER')>, <SNMPVariable value='0' (oid='enterprises.9.9.166.1.15.1.1.2.34.65536', oid_index='',
snmp_type='COUNTER')>, <SNMPVariable value='0' (oid='enterprises.9.9.166.1.15.1.1.2.34.131072', oid_index='',
snmp_type='COUNTER')>, <SNMPVariable value='0' (oid='enterprises.9.9.166.1.15.1.1.2.34.196608', oid_index='',
snmp_type='COUNTER')>]

Linux: vSphere CLI Installation

Sometimes I need a lightweight straight-forward toolset to provision, modify or delete vSphere-Objects.

Installation was a nightmare in former times, but vSphere CLI Release 6.5 works with Ubuntu server 16.04.3 LTS „out of the box“.

And – it’s compatible with ESXi 6.0 hosts. (don’t waste time trying to install vSphere CLI Release 6.0 on a current Linux Server)

Consider the docs:
vSphere CLI Documentation
VMware [Code] vSphere-CLI 6.5

Download the 64-bit Archive
Use the vmware-search or Google…
„Download VMware vSphere Command Line Interface 6.5“ might be a promising query.

I downloaded VMware-vSphere-CLI-6.5.0-4566394.x86_64.tar.gz using my Windows Machine.

Transfer the Archive to the Linux-VM using SCP
Since SCP is available at the Linux-VM and this protocol is fast and secure i don’t see the requirement to think about alternative protocols.

  • I’d suggest to use „PSCP“ from the PuTTY-Suite.
c:\temp>pscp -2 VMware-vSphere-CLI-6.5.0-4566394.x86_64.tar.gz USER_NAME@LINUX_VM_IP:VMware-vSphere-CLI-6.5.0-4566394.x86_64.tar.gz
USER_NAME@LINUX-VM-IP's password: USER_PASS
VMware-vSphere-CLI-6.5.0- | 52264 kB | 3266.5 kB/s | ETA: 00:00:00 | 100%

Disable unneded SSH-Localization
The VMware-Installer seems to not expect non-US-Computers, so avoid automatic special characters from Germany in the SSH-shell.

user@snmp-server:~$ sudo cp /etc/ssh/ssh_config /etc/ssh/ssh_config.bak

Just comment the „SendEnv LANG LC_*“-line:

user@snmp-server:~$ sudo joe /etc/ssh/ssh_config

like this:

user@snmp-server:~$ diff /etc/ssh/ssh_config.bak /etc/ssh/ssh_config
53c53
<     SendEnv LANG LC_*
---
> #    SendEnv LANG LC_*

Install Prerequisites
Taken from Installing Prerequisite Software for Linux Systems with Internet Access „Ubuntu 16.04 64-bit“-Section:

sudo apt-get install lib32z1 lib32ncurses5 build-essential uuid uuid-dev libssl-dev perl-doc libxml-libxml-perl libcrypt-ssleay-perl libsoap-lite-perl libmodule-build-perl

Install vSphere CLI

user@snmp-server:~$ tar xzf VMware-vSphere-CLI-6.5.0-4566394.x86_64.tar.gz

user@snmp-server:~$ sudo vmware-vsphere-cli-distrib/vmware-install.pl
Creating a new vSphere CLI installer database using the tar4 format.

Installing vSphere CLI 6.5.0 build-4566394 for Linux.

You must read and accept the vSphere CLI End User License Agreement to
continue.
Press enter to display it.

VMware® vSphere Software Development Kit License Agreement

Do you accept? (yes/no) yes

Thank you.
WARNING: The http_proxy environment variable is not set. If your system is
using a proxy for Internet access, you must set the http_proxy environment
variable .

If your system has direct Internet access, you can ignore this warning .

WARNING: The ftp_proxy environment variable is not set.  If your system is
using a proxy for Internet access, you must set the ftp_proxy environment
variable .

If your system has direct Internet access, you can ignore this warning .

Please wait while configuring CPAN ...

Below mentioned modules with their version needed to be installed,
these modules are available in your system but vCLI need specific
version to run properly

Module: ExtUtils::MakeMaker, Version: 6.96
Module: Module::Build, Version: 0.4205
Module: Net::FTP, Version: 2.77
Module: LWP::Protocol::https, Version: 6.04
Do you want to continue? (yes/no) yes

Be patient, do something else in the meantime…


        Please wait while configuring perl modules using CPAN ...

CPAN is downloading and installing pre-requisite Perl module "Devel::StackTrace" .
CPAN is downloading and installing pre-requisite Perl module "Class::Data::Inheritable" .
CPAN is downloading and installing pre-requisite Perl module "Convert::ASN1" .
CPAN is downloading and installing pre-requisite Perl module "Crypt::OpenSSL::RSA" .
CPAN is downloading and installing pre-requisite Perl module "Crypt::X509" .
CPAN is downloading and installing pre-requisite Perl module "Exception::Class" .
CPAN is downloading and installing pre-requisite Perl module "UUID::Random" .
CPAN is downloading and installing pre-requisite Perl module "Archive::Zip" .
CPAN is downloading and installing pre-requisite Perl module "Path::Class" .
CPAN is downloading and installing pre-requisite Perl module "Class::MethodMaker" .
CPAN is downloading and installing pre-requisite Perl module "UUID" .
CPAN is downloading and installing pre-requisite Perl module "Data::Dump" .
CPAN is downloading and installing pre-requisite Perl module "Socket6 " .
CPAN is downloading and installing pre-requisite Perl module "IO::Socket::INET6" .
CPAN is downloading and installing pre-requisite Perl module "Net::INET6Glue" .

In which directory do you want to install the executable files? [/usr/bin]

Please wait while copying vSphere CLI files...

The installation of vSphere CLI 6.5.0 build-4566394 for Linux completed
successfully. You can decide to remove this software from your system at any
time by invoking the following command:
"/usr/bin/vmware-uninstall-vSphere-CLI.pl".

This installer has successfully installed both vSphere CLI and the vSphere SDK for Perl.

Enjoy,
--the VMware team

Give it a try: Add a vSwitch with 5 Portgroups

user@snmp-server:~$ vicfg-vswitch --help

Synopsis: /usr/bin/vicfg-vswitch OPTIONS [<vswitch>]


Command-specific options:
   --add
    -a
          Add a new virtual switch
   --add-dvp-uplink
    -P
          Add an uplink adapter (pnic) to a DVPort (valid for vSphere 4.0 and later)
   --add-pg
    -A
          Add a portgroup to a virtual switch
...

Define credentials to login into the vSphere-Environment

user@snmp-server:~$ export VI_SERVER=%SERVER_IP_OR_HOSTNAME%
user@snmp-server:~$ export VI_USERNAME=%VSPHERE_USER_NAME%
user@snmp-server:~$ export VI_PASSWORD=%VSPHERE_USER_PASS%

Create the Switch and the portgroups

user@snmp-server:~$ vicfg-vswitch --add "RTR_LAB" -h %ESXi-HOST-IP%

user@snmp-server:~$ vicfg-vswitch -A "T12" "RTR_LAB" -h %ESXi-HOST-IP%
user@snmp-server:~$ vicfg-vswitch -A "T13" "RTR_LAB" -h %ESXi-HOST-IP%
user@snmp-server:~$ vicfg-vswitch -A "T24" "RTR_LAB" -h %ESXi-HOST-IP%
user@snmp-server:~$ vicfg-vswitch -A "T34" "RTR_LAB" -h %ESXi-HOST-IP%
user@snmp-server:~$ vicfg-vswitch -A "T45" "RTR_LAB" -h %ESXi-HOST-IP%

Isn’t it beautiful? 😉
vSwitch RTR_LAB with 5 portgroups

And i think, even with downloading and installing vSphere-CLI it was faster than GUI-clicking to create this vSwitch 😉