Update Terraform and vSphere-Provider

Terraform is a single .EXE-File so installation is about adding it’s folder to the $PATH-Variable and upgrading is about replacing „terraform.exe“ by the current version.

Update Terraform

C:\RH\LAB\TERRAFORM\vSphere_N9K>terraform --version
Terraform v0.15.2
on windows_amd64

Your version of Terraform is out of date! The latest version
is 1.0.11. You can update by downloading from https://www.terraform.io/downloads.html

C:\dir "c:\Program Files (exe)"\terraform*.*
 Volume in drive C is Windows
 Volume Serial Number is 583C-0C08

 Directory of c:\Program Files (exe)

05.05.2021  22:34        81.442.168 terraform.exe
               1 File(s)     81.442.168 bytes
               0 Dir(s)   8.344.129.536 bytes free

Download the current release („terraform_1.0.11_windows_amd64.zip“) unzip it and copy it to the correct destination:

C:\>dir "c:\Program Files (exe)"\terraform*.*
 Volume in drive C is Windows
 Volume Serial Number is 583C-0C08

 Directory of c:\Program Files (exe)

12.11.2021  17:41        60.838.776 terraform.exe
05.05.2021  22:34        81.442.168 terraform.bak

               2 File(s)    227.786.808 bytes
               0 Dir(s)   8.344.129.536 bytes free

C:\terraform --version
Terraform v1.0.11
on windows_amd64

Update vSphere-Provider

Using this „.tf“-File referencing the „hashicorp/vsphere“-Provider:

terraform {
  required_version = ">= 0.13"
  required_providers {
    vsphere = {
      source  = "hashicorp/vsphere"
    }
  }
}

and initialize the project with current provider(s):

C:\>terraform init -upgrade

Initializing the backend...

Initializing provider plugins...
- Finding latest version of hashicorp/vsphere...
- Installing hashicorp/vsphere v2.0.2...
- Installed hashicorp/vsphere v2.0.2 (signed by HashiCorp)

Terraform has created a lock file .terraform.lock.hcl to record the provider
selections it made above. Include this file in your version control repository
so that Terraform can guarantee to make the same selections by default when
you run "terraform init" in the future.

Terraform has been successfully initialized!

You may now begin working with Terraform. Try running "terraform plan" to see
any changes that are required for your infrastructure. All Terraform commands
should now work.

If you ever set or change modules or backend configuration for Terraform,
rerun this command to reinitialize your working directory. If you forget, other
commands will detect it and remind you to do so if necessary.


Azure-CLI: Download File from Fileshare

ronald@Azure:~$ az storage file list -s FILESHARE -o table
Name               Content Length    Type    Last Modified
-----------------  ----------------  ------  ---------------
DEMO.TXT           9                 file

ronald@Azure:~$ az storage file download -s FILESHARE -p DEMO.TXT
Finished[#############################################################]  100.0000%
{
  "content": null,
  "metadata": {},
  "name": "DEMO.TXT",
  "properties": {
    "contentLength": 9,
    "contentRange": "bytes 0-8/9",
    "contentSettings": {
      "cacheControl": null,
      "contentDisposition": null,
      "contentEncoding": null,
      "contentLanguage": null,
      "contentType": "application/octet-stream"
    },
    "copy": {
      "completionTime": null,
      "id": null,
      "progress": null,
      "source": null,
      "status": null,
      "statusDescription": null
    },
    "etag": "\"0x8D8EB06203D00A5\"",
    "lastModified": "2021-03-19T18:38:01+00:00",
    "serverEncrypted": true
  }
}

ronald@Azure:~$ cat DEMO.TXT
RONRONRON

Azure CLI: Default-Values for config-Session

In most cases, at least some parameters for a set of CLI-Commands remain the same. Setting those as „default“ saves time and reduces human error.

For example, specify your location and ressource-group exactly one time and never repeat it:

ronald@Azure:~$ az configure --defaults group=RG-TEST location=westeurope

Disclaimer

Since i’m trying to get rid of Evernote, too anoying too often, i’ll start to document non-private-stuff here.

RG_NAME=RG_TEST
LOCATION_NAME=westeurope
az group create --resource-group $RG_NAME --location $LOCATION_NAME

az configure --defaults group=$RG_NAME location=$LOCATION_NAME

OVF/OVA-Properties

When deploying Virtual-Machines by OVF/OVA-Files in automated manner, eg. using PowerShell of Terraform, it’s crucial to set all individual deployment parameters using the provisioning system.

Discover the available Properties using

  • PowerShell
  • OFV-Tool

Using PowerShell

Create a vCenter-Connection

PS C:\Program Files\PowerShell\7>

$VIServer = "vcenter.lab.local"
$VIUsername = "administrator@vsphere.local"
$VIPassword = "VMware!23"

$viConnection = Connect-VIServer $VIServer -User $VIUsername -Password $VIPassword

Retrieve the OVF-Config-Object

PS C:\Program Files\PowerShell\7>

$OVA = "T:\csr1000v-universalk9.16.09.01.ova"

$ovfconfig = Get-OvfConfiguration -Server $viConnection $OVA
$ovfconfigHashTable = $ovfconfig.ToHashTable()

Display all contained Properties („=Keys“)

PS C:\Program Files\PowerShell\7>

$ovfconfigHashTable.Keys | Sort-Object

com.cisco.csr1000v.domain-name.1
com.cisco.csr1000v.enable-scp-server.1
com.cisco.csr1000v.enable-ssh-server.1
com.cisco.csr1000v.hostname.1
com.cisco.csr1000v.license.1
com.cisco.csr1000v.login-password.1
com.cisco.csr1000v.login-username.1
com.cisco.csr1000v.mgmt-interface.1
com.cisco.csr1000v.mgmt-ipv4-addr.1
com.cisco.csr1000v.mgmt-ipv4-gateway.1
com.cisco.csr1000v.mgmt-ipv4-network.1
com.cisco.csr1000v.mgmt-vlan.1
com.cisco.csr1000v.pnsc-agent-local-port.1
com.cisco.csr1000v.pnsc-ipv4-addr.1
com.cisco.csr1000v.pnsc-shared-secret-key.1
com.cisco.csr1000v.privilege-password.1
com.cisco.csr1000v.remote-mgmt-ipv4-addr.1
com.cisco.csr1000v.resource-template.1
DeploymentOption
NetworkMapping.GigabitEthernet1
NetworkMapping.GigabitEthernet2
NetworkMapping.GigabitEthernet3

Deployment-Option?

PS C:\Program Files\PowerShell\7>

$ovfconfig.DeploymentOption

Key                : DeploymentOption
Value              :
DefaultValue       : 1CPU-4GB
OvfTypeDescription : string["1CPU-4GB", "2CPU-4GB", "4CPU-4GB", "4CPU-8GB"]
Description        : Small
                     Minimal hardware profile - 1 vCPU, 4 GB RAM

                     Medium
                     Medium hardware profile - 2 vCPUs, 4 GB RAM

                     Large
                     Large hardware profile - 4 vCPUs, 4 GB RAM

                     Large + DRAM Upgrade
                     Large hardware profile (requires purchase of DRAM upgrade SKU) - 4 vCPUs, 8 GB RAM

Using OVF-Tool

OVFTOOL.EXE, provided by VMware (Download OVFTOOL) allows to inspect existing OVA/OFV-Files, too.

T:\"C:\Program Files\VMware\VMware OVF Tool\ovftool.exe" --verifyOnly csr1000v-universalk9.16.09.01.ova
OVF version:   1.0
VirtualApp:    false
Name:          Cisco CSR 1000V Cloud Services Router
Version:       16.09.01
Full Version:  Cisco IOS-XE Software, version 16.09.01
Vendor:        Cisco Systems, Inc.
Product URL:   http://www.cisco.com/en/US/products/ps12559/index.html
Vendor URL:    http://www.cisco.com

Download Size:  413.23 MB

Deployment Sizes:
  Flat disks:   8.40 GB
  Sparse disks: 692.60 MB

Networks:
  Name:        GigabitEthernet1
  Description: Data network 1

  Name:        GigabitEthernet2
  Description: Data network 2

  Name:        GigabitEthernet3
  Description: Data network 3

Virtual Machines:
  Name:               Cisco CSR 1000V Cloud Services Router
  Operating System:   other3xlinux64guest
  Virtual Hardware:
    Families:         vmx-10 vmx-11 vmx-13
    Number of CPUs:   1
    Cores per socket: 1
    Memory:           4.00 GB

    Disks:
      Index:          0
      Instance ID:    3001
      Capacity:       8.00 GB
      Disk Types:     SCSI-VirtualSCSI

    NICs:
      Adapter Type:   VMXNET3
      Connection:     GigabitEthernet1

      Adapter Type:   VMXNET3
      Connection:     GigabitEthernet2

      Adapter Type:   VMXNET3
      Connection:     GigabitEthernet3

Properties:
  ClassId:     com.cisco.csr1000v
  Key:         hostname
  InstanceId   1
  Category:    1. Bootstrap Properties
  Label:       Router Name
  Type:        string(..63)
  Description: Hostname of this router

  ClassId:     com.cisco.csr1000v
  Key:         login-username
  InstanceId   1
  Category:    1. Bootstrap Properties
  Label:       Login Username
  Type:        string(..64)
  Description: Username for remote login

  ClassId:     com.cisco.csr1000v
  Key:         login-password
  InstanceId   1
  Category:    1. Bootstrap Properties
  Label:       Login Password
  Type:        password(..25)
  Description: Password for remote login.
               WARNING: While this password will be stored securely within IOS,
               the plain-text password will be recoverable from the OVF
               descriptor file.

  ClassId:     com.cisco.csr1000v
  Key:         mgmt-interface
  InstanceId   1
  Category:    1. Bootstrap Properties
  Label:       Management Interface
  Type:        string
  Description: Management interface (such as "GigabitEthernet1" or
               "GigabitEthernet1.100")
  Value:       GigabitEthernet1

  ClassId:     com.cisco.csr1000v
  Key:         mgmt-vlan
  InstanceId   1
  Category:    1. Bootstrap Properties
  Label:       Management VLAN
  Type:        string(..5)
  Description: Management dot1Q VLAN (requires specifying a subinterface such
               as "GigabitEthernet1.100" for the Management Interface)

  ClassId:     com.cisco.csr1000v
  Key:         mgmt-ipv4-addr
  InstanceId   1
  Category:    1. Bootstrap Properties
  Label:       Management Interface IPv4 Address/Mask
  Type:        string(..33)
  Description: IPv4 address and mask for management interface (such as
               "192.0.2.100/24" or "192.0.2.100 255.255.255.0"), or "dhcp" to
               configure via DHCP

  ClassId:     com.cisco.csr1000v
  Key:         mgmt-ipv4-gateway
  InstanceId   1
  Category:    1. Bootstrap Properties
  Label:       Management IPv4 Gateway
  Type:        string(..16)
  Description: IPv4 gateway address (such as "192.0.2.1") for management
               interface, or "dhcp" to configure via DHCP

  ClassId:     com.cisco.csr1000v
  Key:         mgmt-ipv4-network
  InstanceId   1
  Category:    1. Bootstrap Properties
  Label:       Management IPv4 Network
  Type:        string(..33)
  Description: IPv4 Network (such as "192.168.2.0/24" or "192.168.2.0
               255.255.255.0") that the management gateway should route to.

  ClassId:     com.cisco.csr1000v
  Key:         pnsc-ipv4-addr
  InstanceId   1
  Category:    1. Bootstrap Properties
  Label:       PNSC IPv4 Address
  Type:        string(..15)
  Description: IPv4 address without mask (such as "192.0.2.110") of PNSC
               service controller

  ClassId:     com.cisco.csr1000v
  Key:         pnsc-agent-local-port
  InstanceId   1
  Category:    1. Bootstrap Properties
  Label:       PNSC Agent Local Port
  Type:        string(..5)
  Description: PNSC service agent SSL port (on local CSR) to receive policies
               from service manager.
               The port shall be in the range of [55001, 61000] if shared IP is
               used, i.e., Remote Management IPv4 Address is not configured.

  ClassId:     com.cisco.csr1000v
  Key:         pnsc-shared-secret-key
  InstanceId   1
  Category:    1. Bootstrap Properties
  Label:       PNSC Shared Secret Key
  Type:        password(..64)
  Description: PNSC service controller shared secret key (8-64 characters) for
               PNSC agent to get SSL certificate from the controller.
               WARNING: While this password will be stored securely within IOS,
               the plain-text password will be recoverable from the OVF
               descriptor file.

  ClassId:     com.cisco.csr1000v
  Key:         remote-mgmt-ipv4-addr
  InstanceId   1
  Category:    1. Bootstrap Properties
  Label:       Remote Management IPv4 Address (optional, deprecated)
  Type:        string(..15)
  Description: Secondary IPv4 address without mask (such as "192.0.2.101") for
               access to remote management features (REST API, etc.). This
               should be in the same IP subnet as the Management Interface IPv4
               Address entered above.
               Warning: THIS IS A DEPRECATED OPTION IN THIS RELEASE.

  ClassId:     com.cisco.csr1000v
  Key:         enable-scp-server
  InstanceId   1
  Category:    2. Features
  Label:       Enable SCP Server
  Type:        boolean
  Description: Enable IOS SCP server feature
  Value:       False

  ClassId:     com.cisco.csr1000v
  Key:         enable-ssh-server
  InstanceId   1
  Category:    2. Features
  Label:       Enable SSH Login and Disable Telnet Login
  Type:        boolean
  Description: Enable remote login via SSH and disable remote login via telnet.
               Requires login-username and login-password to be set!
  Value:       False

  ClassId:     com.cisco.csr1000v
  Key:         privilege-password
  InstanceId   1
  Category:    3. Additional Configuration Properties
  Label:       Enable Password
  Type:        password(..25)
  Description: Password for privileged (enable) access.
               WARNING: While this password will be stored securely within IOS,
               the plain-text password will be recoverable from the OVF
               descriptor file.

  ClassId:     com.cisco.csr1000v
  Key:         domain-name
  InstanceId   1
  Category:    3. Additional Configuration Properties
  Label:       Domain Name
  Type:        string(..238)
  Description: Network domain name (such as "cisco.com")

  ClassId:     com.cisco.csr1000v
  Key:         license
  InstanceId   1
  Category:    3. Additional Configuration Properties
  Label:       License boot level
  Type:        string(..30)
  Description: Configure license boot level(such as ax, security, appx, ipbase,
               lite, vacs)
  Value:       ax

  ClassId:     com.cisco.csr1000v
  Key:         resource-template
  InstanceId   1
  Category:    3. Additional Configuration Properties
  Label:       Resource template
  Type:        string(..30)
  Description: Configure Resource template(service_plane_medium,
               service_plane_heavy or default)
  Value:       default

Deployment Options:
  Id:          1CPU-4GB  (default)
  Label:       Small
  Description: Minimal hardware profile - 1 vCPU, 4 GB RAM

  Id:          2CPU-4GB
  Label:       Medium
  Description: Medium hardware profile - 2 vCPUs, 4 GB RAM

  Id:          4CPU-4GB
  Label:       Large
  Description: Large hardware profile - 4 vCPUs, 4 GB RAM

  Id:          4CPU-8GB
  Label:       Large + DRAM Upgrade
  Description: Large hardware profile (requires purchase of DRAM upgrade SKU) -
               4 vCPUs, 8 GB RAM

References:
  File:  csr1000v_harddisk.vmdk
  File:  bdeo.sh
  File:  README-OVF.txt
  File:  README-BDEO.txt
  File:  cot.tgz
  File:  csr1000v-universalk9.16.09.01-vga.iso

OVF-Tool – Extra-Config?

Error: OVF Package is not supported by target:
 - Line -1: Unsupported value 'ethernet0.rxDataRingEnabled' for attribute 'key' on element 'ExtraConfig'.
 - Line -1: Unsupported value 'ethernet1.rxDataRingEnabled' for attribute 'key' on element 'ExtraConfig'.
 - Line -1: Unsupported value 'ethernet2.rxDataRingEnabled' for attribute 'key' on element 'ExtraConfig'.
 - Line -1: Unsupported value 'ethernet3.rxDataRingEnabled' for attribute 'key' on element 'ExtraConfig'.
 - Line -1: Unsupported value 'isolation.tools.diskWiper.disable' for attribute 'key' on element 'ExtraConfig'.
 - Line -1: Unsupported value 'isolation.tools.memSchedFakeSampleStats.disable' for attribute 'key' on element 'ExtraConfig'.
 - Line -1: Unsupported value 'isolation.tools.diskShrink.disable' for attribute 'key' on element 'ExtraConfig'.
 - Line -1: Unsupported value 'isolation.tools.vmxDnDVersionGet.disable' for attribute 'key' on element 'ExtraConfig'.
 - Line -1: Unsupported value 'isolation.tools.unityActive.disable' for attribute 'key' on element 'ExtraConfig'.
 - Line -1: Unsupported value 'isolation.tools.guestDnDVersionSet.disable' for attribute 'key' on element 'ExtraConfig'.
 - Line -1: Unsupported value 'snapshot.maxSnapshots' for attribute 'key' on element 'ExtraConfig'.
 - Line -1: Unsupported value 'RemoteDisplay.maxConnections' for attribute 'key' on element 'ExtraConfig'.

The CLI-Switch „–allowExtraConfig“ enables the support for ExtraConfig-Key/Values:

T:\>"C:\Program Files\VMware\VMware OVF Tool\ovftool.exe" --verifyOnly --allowExtraConfig nsx-unified-appliance-3.1.3.5.0.19068437.ova
The provided certificate is in valid period
Source is signed and the certificate validates
Certificate information:
  CertIssuer:/C=US/ST=California/L=Palo Alto/O=VMware, Inc.
  CertSubject:/C=US/ST=California/L=Palo Alto/O=VMware, Inc.
  -----BEGIN CERTIFICATE-----
  MIIDyzCCArOgAwIBAgIJAKH7xLtwMqSZMA0GCSqGSIb3DQEBBQUAME0xCzAJBgNV
  BAYTAlVTMRMwEQYDVQQIEwpDYWxpZm9ybmlhMRIwEAYDVQQHEwlQYWxvIEFsdG8x
  FTATBgNVBAoTDFZNd2FyZSwgSW5jLjAeFw0xMDAyMjYyMjE3NDFaFw0yNjAxMDMy
  MjE3NDFaME0xCzAJBgNVBAYTAlVTMRMwEQYDVQQIEwpDYWxpZm9ybmlhMRIwEAYD
  VQQHEwlQYWxvIEFsdG8xFTATBgNVBAoTDFZNd2FyZSwgSW5jLjCCASAwDQYJKoZI
  hvcNAQEBBQADggENADCCAQgCggEBALU9NUtC39fqG7yo2XAswUmtli9uA+31uAMw
  9FFHAEv/it8pzBQZ/4r+2bN+GnXOWhuDd1K4ApKMRvoO4LwQfZxrkx4pXrsu0gdb
  4OunHw0D8MrdzSoob8Js/uq+IJ+8Bhsc6b7RzTUt9HeDWzHasAJVgMsjehGt23ay
  9FKOT6dVD6D/Xi3qJnB/4t/XNS6L63dC3ea4guzKDyLaXIP5bf/m56jvVImFjhhT
  W2ASbnEUlZIVrEuyVcdG7e3FvZufE553JmHL0YG/0m5bIHXKRzBRx0D3HHOAzOKw
  kkOnxJHSTN4Hz8hSYCWvzUAjSYL3Q8qiTd7GHJ2ynsRnu3KlzKUCAQOjga8wgaww
  HQYDVR0OBBYEFHg8KQJdm8NPQDmYP41uEgKG+VNwMH0GA1UdIwR2MHSAFHg8KQJd
  m8NPQDmYP41uEgKG+VNwoVGkTzBNMQswCQYDVQQGEwJVUzETMBEGA1UECBMKQ2Fs
  aWZvcm5pYTESMBAGA1UEBxMJUGFsbyBBbHRvMRUwEwYDVQQKEwxWTXdhcmUsIElu
  Yy6CCQCh+8S7cDKkmTAMBgNVHRMEBTADAQH/MA0GCSqGSIb3DQEBBQUAA4IBAQCP
  nVEBVF2jYEsgaTJ1v17HNTVTD5pBPfbQk/2vYVZEWL20PtJuLeSWwoo5+TnCSp69
  i9n1Hpm9JWHjyb1Lba8Xx7VC4FferIyxt0ivRm9l9ouo/pQAR8xyqjTg1qfr5V8S
  fZElKbjpzSMPrxLwF77h+YB+YjqWAJpVV+fAkAvK7K9vMiFgW60teZBxVW/XlmG0
  IJaSUWSI3/A+bA6fuIy8PMmpQMtm0droHrCnViAVRhMMgEC/doMH1GqUSmoiyQ1G
  PifLAp5wV5/HV+S9AGrb8HGdWIvW+kBgmCl0wSf2JFYm1bpq30CVE4EC0MAY1mJG
  vSqQGIbCybw5KTCXRQ8d
  -----END CERTIFICATE-----


OVF version:   1.0
VirtualApp:    false
Name:          nsx-unified-appliance
Version:       3.1.3.5
Full Version:  3.1.3.5.0.19068437
Vendor:        VMware, Inc

Download Size:  8.37 GB

Deployment Sizes:
  Flat disks:   300.00 GB
  Sparse disks: 4.74 GB

Networks:
  Name:        Network 1
  Description: Network 1

Virtual Machines:
  Name:               nsx-unified-appliance
  Operating System:   ubuntu64guest
  Virtual Hardware:
    Families:         vmx-10 vmx-11 vmx-13
    Number of CPUs:   6
    Cores per socket: 1
    Memory:           24.00 GB

    Disks:
      Index:          0
      Instance ID:    5
      Capacity:       200.00 GB
      Disk Types:     SCSI-lsilogic

      Index:          1
      Instance ID:    6
      Capacity:       100.00 GB
      Disk Types:     SCSI-lsilogic

    NICs:
      Adapter Type:   VmxNet3
      Connection:     Network 1

Properties:
  Key:         nsx_passwd_0
  Category:    Application
  Label:       System Root User Password
  Type:        password(12..)
  Description: The password for root user for this VM.
               Please follow the password complexity rule as below:
                   - minimum of 12 characters in length
                   - >=1 uppercase character
                   - >=1 lowercase character
                   - >=1 numeric character
                   - >=1 special character
                   - >=5 unique characters
                   - default password complexity rules as enforced by the Linux
               PAM module
                   NOTE: Password strength validation will occur during VM
               boot.  If the password does not meet the above criteria then
               login as root user for the change password prompt to appear.


  Key:         nsx_cli_passwd_0
  Category:    Application
  Label:       CLI "admin" User Password
  Type:        password(12..)
  Description: The password for default CLI user for this VM.
               Please follow the password complexity rule as below:
                   - minimum of 12 characters in length
                   - >=1 uppercase character
                   - >=1 lowercase character
                   - >=1 numeric character
                   - >=1 special character
                   - >=5 unique characters
                   - default password complexity rules as enforced by the Linux
               PAM module
                   NOTE: Password strength validation will occur during VM
               boot.  If the password does not meet the above criteria then
               login as admin user for the change password prompt to appear.


  Key:         nsx_cli_audit_passwd_0
  Category:    Application
  Label:       CLI "audit" User Password
  Type:        password
  Description: The password for audit CLI user for this VM.
               Please follow the password complexity rule as below:
                   - minimum of 12 characters in length
                   - >=1 uppercase character
                   - >=1 lowercase character
                   - >=1 numeric character
                   - >=1 special character
                   - >=5 unique characters
                   - default password complexity rules as enforced by the Linux
               PAM module
                   NOTE: Password strength validation will occur during VM
               boot.  If the password does not meet the above criteria then
               login as admin user and use the NSX CLI command "set user audit"
               to change the audit user password.


  Key:         nsx_cli_username
  Category:    Application
  Label:       CLI "admin" username (default: admin)
  Type:        string
  Description: Username of administrator user.

  Key:         nsx_cli_audit_username
  Category:    Application
  Label:       CLI "audit" username (default: audit)
  Type:        string
  Description: Username of auditor user.

  Key:         extraPara
  Category:    Application
  Label:       Optional parameters
  Type:        password
  Description: For internal use only.


  Key:         nsx_hostname
  Category:    Network properties
  Label:       Hostname
  Type:        string(1..)
  Description: The hostname for this VM.
                   NOTE: Underscores in hostname are not allowed.  If hostname
               contains underscore, then the appliance gets deployed with
               'nsx-manager' as hostname.


  Key:         nsx_role
  Category:    Network properties
  Label:       Rolename
  Type:        string["NSX Manager","nsx-cloud-service-manager","NSX Global
               Manager"]
  Description: The role for this VM. Currently supports
               'nsx-cloud-service-manager', 'NSX Global Manager' OR 'NSX
               Manager' as rolename.

  Value:       NSX Manager

  Key:         nsx_ip_0
  Category:    Network properties
  Label:       Management Network IPv4 Address
  Type:        string(1..)
  Description: The IPv4 Address for the first interface.

  Key:         nsx_netmask_0
  Category:    Network properties
  Label:       Management Network Netmask
  Type:        string(1..)
  Description: The netmask for the first interface.

  Key:         nsx_gateway_0
  Category:    Network properties
  Label:       Default IPv4 Gateway
  Type:        string
  Description: The default gateway for this VM.

  Key:         nsx_dns1_0
  Category:    DNS
  Label:       DNS Server list
  Type:        string
  Description: The space separated DNS server list for this VM (valid only if
               an IPv4 address is specified for the first interface).
                   NOTE: At most three name servers can be configured (first 3
               name servers passed in list will be used and all other will be
               ignored)


  Key:         nsx_domain_0
  Category:    DNS
  Label:       Domain Search List
  Type:        string
  Description: The space separated domain search list for this VM (valid only
               if an IPv4 address is specified for the first interface).

  Key:         nsx_ntp_0
  Category:    Services Configuration
  Label:       NTP Server List
  Type:        string
  Description: The NTP server list(space separated) for this VM.

  Key:         nsx_isSSHEnabled
  Category:    Services Configuration
  Label:       Enable SSH
  Type:        boolean
  Description: Enabling SSH service is not recommended for security reasons.
  Value:       False

  Key:         nsx_allowSSHRootLogin
  Category:    Services Configuration
  Label:       Allow root SSH logins
  Type:        boolean
  Description: Allowing root SSH logins is not recommended for security
               reasons.
  Value:       False

  Key:         nsx_swIntegrityCheck
  Category:    Services Configuration
  Label:       Software Integrity Checker
  Type:        boolean
  Description: Software Integrity Checker is required only for NDcPP 2.2
  Value:       False

  Key:         mpIp
  Category:    Internal Properties - Do not set these parameters.
  Label:       Manager IP
  Type:        string
  Description: For internal use only. Do not set this parameter.


  Key:         mpToken
  Category:    Internal Properties - Do not set these parameters.
  Label:       Manager Token
  Type:        password
  Description: For internal use only. Do not set this parameter.


  Key:         mpThumbprint
  Category:    Internal Properties - Do not set these parameters.
  Label:       Manager Thumbprint
  Type:        string
  Description: For internal use only. Do not set this parameter.


  Key:         mpNodeId
  Category:    Internal Properties - Do not set these parameters.
  Label:       Manager Node ID
  Type:        string
  Description: For internal use only. Do not set this parameter.


  Key:         mpClusterId
  Category:    Internal Properties - Do not set these parameters.
  Label:       Cluster ID of First Manager Cluster
  Type:        string
  Description: For internal use only. Do not set this parameter.


Deployment Options:
  Id:          extra_small
  Label:       ExtraSmall
  Description:
               IMPORTANT: This configuration is only supported for the
               nsx-cloud-service-manager role.

               This configuration requires the following:
               * 2 vCPU
               * 8GB RAM
               * 300GB Storage
               * VM hardware version 10 or greater (vSphere 5.5 or greater)


  Id:          small
  Label:       Small
  Description:
               IMPORTANT: This configuration is supported for Global Manager
               Production deployment

               This configuration requires the following:
               * 4 vCPU
               * 16GB RAM
               * 300GB Storage
               * VM hardware version 10 or greater (vSphere 5.5 or greater)


  Id:          medium  (default)
  Label:       Medium
  Description:
               IMPORTANT: This configuration is supported for Local Manager
               Production deployment ('NSX Manager' role)
                          This is supported for Global Manager Production
               deployment (but not required)

               This configuration requires the following:
               * 6 vCPU
               * 24GB RAM
               * 300GB Storage
               * VM hardware version 10 or greater (vSphere 5.5 or greater)


  Id:          large
  Label:       Large
  Description:
               IMPORTANT: This configuration is supported for Local Manager
               Production deployment ('NSX Manager' role)
                          This is supported for Global Manager Production
               deployment (but not required)

               This configuration requires the following:
               * 12 vCPU
               * 48GB RAM
               * 300GB Storage
               * VM hardware version 10 or greater (vSphere 5.5 or greater)


References:
  File:  nsx-unified-appliance.vmdk
  File:  nsx-unified-appliance-secondary.vmdk

Provision a Cisco CSR1000V-Router as Virtual-Box-VM with sliptreamed Configuration, wait until it’s up and open an Putty-SSH-Connection

The existing Windows-Comman-Script has been enhanced so it now

  • waits until the Router-VM is up
  • got an IP-Address assigned using DHCP.

For Demonstration-Purposes an SSH-Connection will be established.

  • The public-key of my laptop-ssh-client is part of the slipstreamed Router-Configuration.

Deploy a Router-VM with hostname „CSY“.

C:\RH\work\entwicklung\csr1000v-provision-in-virtualbox>CSR1000v-Virtual-Box.cmd CSY
Virtual machine 'CSY' is created and registered.
UUID: 915a7495-0728-4fc5-9c4c-21b3106a07e5
Settings file: 'c:\RH\LAB\VM\CSY\CSY.vbox'
Creating ISO image at c:\RH\LAB\VM\CSY\CSY_config.iso, 1 Files, Size: 8,00 KB
100%
0%...10%...20%...30%...40%...50%...60%...70%...80%...90%...100%
Medium created. UUID: b79d708a-0a0a-4866-853b-3ac45c6a6127
Waiting for VM "CSY" to power on...
VM "CSY" has been successfully started.
Waiting for VM "CSY" to be initialized...
Router "CSY" up and running, using IP=192.168.56.102
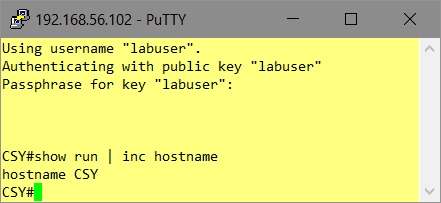
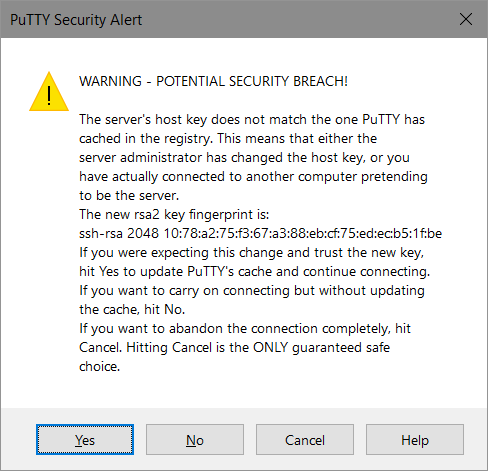
Establishing SSH-Connection as "labuser"
Done

Establish an SSH-Connection to the discovered Router-IP:

Have a look to the startup-config used:

This is the „CMD“-Script used:

@echo off

: Ronald Heitmann

:set VM=CSR1000vX
:set /p VM="Enter CSR1000v Hostname:"
: Parameter given? Use it as VM-Name
set VM=%1
if not defined VM set /p VM="Enter CSR1000v Hostname:"

:echo %VM%

set PUTTYUSER=labuser
set PUTTYPK=C:\RH\work\putty\labuser.ppk


set BASE=c:\RH\LAB\VM

set ISO=C:\Downloads\csr1000v-universalk9.16.09.0x.iso

: Create VM
:VBoxManage createvm --name %VM% --ostype "Linux_64" --basefolder %BASE% --register
VBoxManage createvm --name %VM% --ostype "Linux26_64" --basefolder %BASE% --register

:now the Path in the Filesystem to ...LOC... exists
set LOC=%BASE%\%VM%

: Create ISO containing slipstreamed config-file
: use UNXTOOLS "sed" to customize the "hostname"-Command
:
set CFGISO=%LOC%\%VM%_config.iso
set CFGSRC=C:\RH\LAB\VM\iosxe_config.txt
set CFGTXT=%LOC%\iosxe_config.txt
cat %CFGSRC% | sed "s/HOSTNAME/%VM%/g" > %CFGTXT%
"%ProgramFiles(x86)%"\CDBurnerXP\cdbxpcmd.exe --burn-data -file:%CFGTXT% -iso:%CFGISO% -format:iso

: Customize VM
VBoxManage modifyvm %VM% --memory 4096
VBoxManage modifyvm %VM% --vram 16
VBoxManage modifyvm %VM% --pae on --paravirtprovider default --hwvirtex on --nestedpaging on

: Storage
VBoxManage createhd --filename %LOC%\%VM%.vdi --size 8192
VBoxManage storagectl %VM% --name "IDE-CTL" --add ide --portcount 2 --bootable on
VBoxManage storageattach %VM% --storagectl IDE-CTL --port 0 --device 0 --type hdd --medium %LOC%\%VM%.vdi
VBoxManage storageattach %VM% --storagectl IDE-CTL --port 1 --device 0 --type dvddrive --medium %ISO%
VBoxManage storageattach %VM% --storagectl IDE-CTL --port 1 --device 1 --type dvddrive --medium %CFGISO%
VBoxManage modifyvm %VM% --boot1=dvd --boot2=disk --boot3=none --boot4=none

: Serial-Interfaces via "Pipe"
VBoxManage modifyvm %VM% --uartmode1 server \\.\pipe\%VM%
VBoxManage modifyvm %VM% --uart1 0x3f8 4
VBoxManage modifyvm %VM% --uartmode2 server \\.\pipe\%VM%_diag
VBoxManage modifyvm %VM% --uart2 0x2f8 4

: Audio
VBoxManage modifyvm %VM% --audio none

: NICs
VBoxManage modifyvm %VM% --nic1 nat --nic2 hostonly --nic3 hostonly --nic4 hostonly
VBoxManage modifyvm %VM% --nictype1 virtio --nictype2 virtio --nictype3 virtio --nictype4 virtio
VBoxManage modifyvm %VM% --nicpromisc1 allow-all --nicpromisc2 allow-all --nicpromisc3 allow-all --nicpromisc4 allow-all
VBoxManage modifyvm %VM% --hostonlyadapter2 "VirtualBox Host-Only Ethernet Adapter"
VBoxManage modifyvm %VM% --hostonlyadapter3 "VirtualBox Host-Only Ethernet Adapter"
VBoxManage modifyvm %VM% --hostonlyadapter4 "VirtualBox Host-Only Ethernet Adapter"

: Set the VM-Logo for the VirtualBox-Inventory
VBoxManage modifyvm %VM% --iconfile C:\RH\LAB\72px-Cisco_logo.svg.png

: Boot the VM, it'l reboot once to apply the running-config
VBoxManage startvm %VM% --type headless

: Wait for the VM to be fully initialized
: - with DHCP-IP-Address at "Gig 2"
: - and store this IP-Address in Variable VMIP
echo Waiting for VM "%VM%" to be initialized...
for /f %%I in ('python WaitForCDPNeighbor.py -n %VM% -c -i "VirtualBox Host-Only Ethernet Adapter" 2^> nul') do @(set VMIP=%%I)

echo Router "%VM%" up and running, using IP=%VMIP%

: Connect to Router using Putty/SSH
echo Establishing SSH-Connection as "%PUTTYUSER%"
start putty -ssh -i %PUTTYPK% %PUTTYUSER%@%VMIP%

echo Done

WaitForCDPNeighbor.py enhanced: Wait for CDP Hostname with usable connected IP-Address.

The following version adds a „-c“ option: „Connected IP-Address“-Check.

  • the script exits, when the Router-VM is up and running and has an usable IP-Address

The Script still checks all CDP-Packets received at the specified Interface:

  • If the Sender has the correct „Hostname“ it reads the CDP-Management-IP-Address announced.
  • This IP-Address has to be within the IP-Range of any connected IP-Network at the specified Interface.

So it’ll be possible to establish a SSH-Session to the router-VM.

C:\> echo %VM%
CSX

C:\> python WaitForCDPNeighbor.py -n %VM% -c -i "VirtualBox Host-Only Ethernet Adapter"
192.168.56.101
#! /usr/bin/env python

# Ronald Heitmann
#
import argparse

from scapy.all import *
load_contrib("cdp")

from netaddr import IPNetwork, IPAddress

from netifaces import AF_INET, AF_INET6, AF_LINK
import netifaces

# returns a list of all IP-Adresses bound to the specified Interface "if_name"
def get_connected(if_name):
  if_id = ""
  networks = []

  for i in ifaces.data.keys():
    iface = ifaces.data[i]
    wname = iface.data['name']
    if wname == if_name:
      if_id = i
      addresses = netifaces.ifaddresses(i)
      if AF_INET in addresses:
        for addr in netifaces.ifaddresses(i)[AF_INET]:
          #print(addr)
          ipnetwork = IPNetwork(addr["addr"]+"/"+addr["netmask"]).cidr
          networks.append(ipnetwork)
  #print(networks)
  return networks

# checks, if the IP-Address "ip" is within the subnet-range of any network contained in the list "networks"

def is_IP_connected(ip, networks):
  found = False
  ipnetwork = IPNetwork(ip).cidr

  for n in networks:
    if (ipnetwork in n):
      found = True

  return found

  
def main():

    # Parse CLI-Arguments
    parser = argparse.ArgumentParser(description='Wait for a CDP-Neighbor.')
    parser.add_argument("-i", "--interface", help="monitored interface", default="VirtualBox Host-Only Ethernet Adapter")
    parser.add_argument("-n", "--hostname", help="Neighbor to wait for", required=True)
    parser.add_argument("-c", "--connected", help="wait, until CDP-Neighbor announces an directly-connected IP-Address", action='store_true')
    args = parser.parse_args()

    #looking for a specific hostname
    #
    hostname = ""
    wait_for_hostname = args.hostname

    #watching for CDP-Packets from this host on a specific interface
    #the router-IP should use a directly-connected IP-Address
    ip = "0.0.0.0"
    wait_for_connected = args.connected
    
    interface=args.interface
    networks = get_connected(interface)
    #print(networks) 

    #CDP
    capturefilter="ether dst 01:00:0c:cc:cc:cc"

    while not((hostname == wait_for_hostname) and (not(wait_for_connected) or is_IP_connected(ip,networks))):
      p=sniff(iface=interface, count=1, filter=capturefilter)
      pkt=p[0]
      #print("Packet received",pkt.show())

      #is this a CDP-Packet containing a hostname?
      if (CDPMsgDeviceID in pkt):
        #is this the CDP-Neighbor we're looking for?
        device=pkt["CDPMsgDeviceID"].val.decode()
        hostname=device.split(".")[0]
        #print("Hostname:",hostname)

        if (hostname == wait_for_hostname):
          #is this a CDP-Packet containing a management-IP-Address?
          if (CDPAddrRecordIPv4 in pkt):
            ip=pkt["CDPAddrRecordIPv4"].addr
            #print("IP-Address found:",ip)

    #return the IP-Address to the calling application or the CLI
    return ip

if __name__ == "__main__":
    print(main())

Python Scapy: Wait for CDP-Neighbor

After provisioning a new Cisco CSR1000V-Router this script

  • waits until the router is fully deployed
  • got it’s Management-IP-Address assigned via DHCP.

and returns this Management IP-Address.

  1. Prepare
  2. First, install „netaddr“-package.

    • needed to check, if the management-IP of the CDP-Neighbor is in the correct IP-Subnet
    C:\RH>pip install netaddr
    Collecting netaddr
      Downloading https://files.pythonhosted.org/packages/ba/97/ce14451a9fd7bdb5a397abf99b24a1a6bb7a1a440b019bebd2e9a0dbec74/netaddr-0.7.19-py2.py3-none-any.whl (1.6MB)
        100% |████████████████████████████████| 1.6MB 4.0MB/s
    Installing collected packages: netaddr
    Successfully installed netaddr-0.7.19
    
  3. the „wait-for-CDP“-Script
  4. Obviously far to much hard-coded stuff, just as an example 😉 waiting for a CDP-Neighbor to appear with the following properties:

    • hostname „CSR-A“
    • an IP-Address within the network „192.168.56.0 /24“
    • at the interface

    • VirtualBox Host-Only-Network
    #! /usr/bin/env python
    
    from scapy.all import *
    load_contrib("cdp")
    
    from netaddr import IPNetwork, IPAddress
    
    # run it for max. 99 Packets
    ip = "0.0.0.0"
    wait_for_hostname = "CSR-A"
    wait_for_host_in_network = "192.168.56.0/24"
    
    interface="VirtualBox Host-Only Ethernet Adapter"
    capturefilter="ether dst 01:00:0c:cc:cc:cc"
    
    while not(IPAddress(ip) in IPNetwork(wait_for_host_in_network)):
      p=sniff(iface=interface, count=1, filter=capturefilter)
      pkt=p[0]
      #print("Packet received",pkt.show())
    
      #is this a CDP-Packet containing a hostname?
      if (CDPMsgDeviceID in pkt):
        #is this the CDP-Neighbor we're looking for?
        device=pkt["CDPMsgDeviceID"].val.decode()
        hostname=device.split(".")[0]
        #print("Hostname:",hostname)
    
        if (hostname == wait_for_hostname):
          #is this a CDP-Packet containing a management-IP-Address?
          if (CDPAddrRecordIPv4 in pkt):
            ip=pkt["CDPAddrRecordIPv4"].addr
            #print("IP-Address found:",ip)
    
    #return the IP-Address to the calling application or the CLI
    print(ip)
    
  5. Provision a new CSR1000V Router named „CSR-A“
  6. C:\RH>CSR1000v-Virtual-Box.cmd
    Enter CSR1000v Hostname:CSR-A
    Virtual machine 'CSR-A' is created and registered.
    UUID: 8a9c969e-3895-4a7c-9cbc-5f5551bf1b7b
    Settings file: 'c:\RH\LAB\VM\CSR-A\CSR-A.vbox'
    Creating ISO image at c:\RH\LAB\VM\CSR-A\config.iso, 1 Files, Size: 8,00 KB
    100%
    0%...10%...20%...30%...40%...50%...60%...70%...80%...90%...100%
    Medium created. UUID: 55ea8df5-7e3c-4485-8e08-9302cb61a09d
    Waiting for VM "CSR-A" to power on...
    VM "CSR-A" has been successfully started.
    
  7. Run the „wait-for-CDP-Neighbor“-Script
  8. In a second CMD-Box, and… Be patient, of course.

    C:\RH>python wait-for-cdpneighbor.py
    192.168.56.101
    
  9. Or store the returned IP-Address in an Shell-Variable „ROUTER-IP“/li>
    C:\RH>for /f %I in ('python wait-for-cdpneighbor.py 2^> nul') do @(set ROUTER-IP=%I)
    
  10. and pass it to putty – using public-key authentication
  11. The Public-Key for user „labuser“ is part of my baseline-config used to provision the virtual-router.

    C:\RH>putty -ssh -i C:\RH\work\putty-rsa-key\labuser.ppk labuser@%ROUTER-IP%
    

    Works, this is a nice preparation for an automated virtual ansible-lab, too!

Scripted provisioning of a Cisco CSR1000V as VirtualBox-Guest: Slipstream initial startup-config

To enable immediate remote-access to brandnew deployed virtual Cisco CSR1000V-Routers by scripts, ansible etc. it’s necessary to predeploy the startup-config at least with public-rsa-keys etc.

  1. Prepare
  2. Download and install the nice tool http://CDBurnerXP. This will install a companion cli-tool cdbxpcmd.exe along with the GUI-Version.

    It’ll be used to prepare an ISO-„CDROM“ containing the prepared „startup-config“-file.

  3. Prepare
  4. Prepare an IOS-XE Configuration file…

    !
    hostname HOSTNAME
    !
    ...
    !
    !
    platform console serial
    !
    crypto key generate rsa modulus 2048 label RSA_SSH
    !
    !
    username labuser privilege 15
    !
    ip ssh pubkey-chain
    !
    username labuser
      key-string    
      ...
    exit
    exit
    !
    exit
    !
    ...
    !
    ip ssh rsa keypair-name RSA_SSH
    !
    ip ssh server algorithm authentication publickey
    !
    ...
    !
    line vty 0 15
      login local
      transport input ssh
      access-class ACL_NMM in vrf-also
    !
    end
    
  5. Modify the existing script
  6. These commands create the ISO-File in the %LOC%-Path.

    set VM=CSR1000vX
    
    ...
    
    : Create ISO containing slipstreamed config-file
    : use UNXTOOLS "sed" to customize the "hostname"-Command
    :
    set CFGISO=%LOC%\config.iso
    set CFGSRC=C:\RH\LAB\VM\iosxe_config.txt
    set CFGTXT=%LOC%\iosxe_config.txt
    cat %CFGSRC% | sed "s/HOSTNAME/%VM%/g" > %CFGTXT%
    "%ProgramFiles(x86)%"\CDBurnerXP\cdbxpcmd.exe --burn-data -file:%CFGTXT% -iso:%CFGISO% -format:iso
    
  7. Mount this ISO to the VM
  8. The contained config-file will get automatically applied when the router boots the first time.

    VBoxManage storageattach %VM% --storagectl IDE-CTL --port 1 --device 1 --type dvddrive --medium %CFGISO%
    
  9. Run the VM
    • the config-file gets applied
  10. access the router
  11. This depends of the configuration-file, of course.

Scripted provisioning of a Cisco CSR1000V as VirtualBox-Guest

In a lab environment it might be handy to quickly rollout new (virtual) routers without much manual intervention. The following script creates a VirtualBox-VM and boots it up.

  1. Prepare
  2. Install VirtualBox and have a CSR1000V-ISO-File ready.

    set VM=CSR1000V
    set BASE=c:\RH\LAB\VM
    
    set ISO=C:\Downloads\csr1000v-universalk9.16.09.01.iso
    
    : Create VM
    VBoxManage createvm --name %VM% --ostype "Linux26_64" --basefolder %BASE% --register
    
    !:now the Path in the Filesystem to ...LOC... exists
    set LOC=%BASE%\%VM%
    
    : Customize VM
    VBoxManage modifyvm %VM% --memory 4096
    VBoxManage modifyvm %VM% --vram 16
    VBoxManage modifyvm %VM% --pae on --paravirtprovider default --hwvirtex on --nestedpaging on
    
    : Storage
    VBoxManage createhd --filename %LOC%\%VM%.vdi --size 8192
    VBoxManage storagectl %VM% --name "IDE-CTL" --add ide --portcount 2 --bootable on
    VBoxManage storageattach %VM% --storagectl IDE-CTL --port 0 --device 0 --type hdd --medium %LOC%\%VM%.vdi
    VBoxManage storageattach %VM% --storagectl IDE-CTL --port 1 --device 0 --type dvddrive --medium %ISO%
    
    VBoxManage modifyvm %VM% --boot1=dvd --boot2=disk --boot3=none --boot4=none
    
    : Serial-Interfaces via "Pipe"
    VBoxManage modifyvm %VM% --uartmode1 server \\.\pipe\%VM%
    VBoxManage modifyvm %VM% --uart1 0x3f8 4
    VBoxManage modifyvm %VM% --uartmode2 server \\.\pipe\%VM%_diag
    VBoxManage modifyvm %VM% --uart2 0x2f8 4
    
    : Audio
    VBoxManage modifyvm %VM% --audio none
    
    : NICs
    VBoxManage modifyvm %VM% --nic1 nat --nic2 hostonly --nic3 hostonly --nic4 hostonly
    VBoxManage modifyvm %VM% --nictype1 virtio --nictype2 virtio --nictype3 virtio --nictype4 virtio
    VBoxManage modifyvm %VM% --nicpromisc1 allow-all --nicpromisc2 allow-all --nicpromisc3 allow-all --nicpromisc4 allow-all
    VBoxManage modifyvm %VM% --hostonlyadapter2 "VirtualBox Host-Only Ethernet Adapter"
    VBoxManage modifyvm %VM% --hostonlyadapter3 "VirtualBox Host-Only Ethernet Adapter"
    VBoxManage modifyvm %VM% --hostonlyadapter4 "VirtualBox Host-Only Ethernet Adapter"
    
    : Set the VM-Logo for the VirtualBox-Inventory
    VBoxManage modifyvm %VM% --iconfile C:\RH\LAB\72px-Cisco_logo.svg.png
    
    : Boot the VM, it'l reboot once to apply the running-config
    VBoxManage startvm %VM%
    
  3. Execute
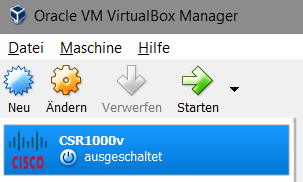
  4. The Inventory populates:

  5. Use it
  6. conf t
      platform console serial
    end
    

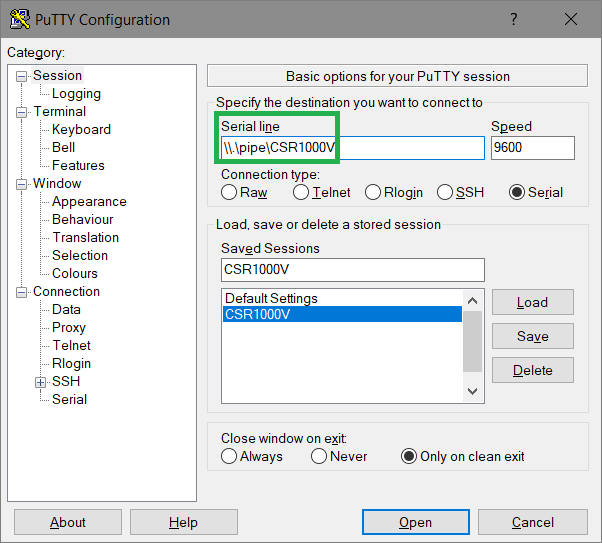
    After another reboot the serial console can be accessed by a windows pipe:

    The pipe provides access to the serial-console: