The „refreshenv“-CMD/Powershell-Command updates all Environment-Variables e.g. after installing a new software package.
C:\WINDOWS\system32>refreshenv
Refreshing environment variables from registry for cmd.exe. Please wait...Finished..
networking, computing, virtualization, automation
The „refreshenv“-CMD/Powershell-Command updates all Environment-Variables e.g. after installing a new software package.
C:\WINDOWS\system32>refreshenv
Refreshing environment variables from registry for cmd.exe. Please wait...Finished..
Both Protocols are absolutely useless for all common use-cases, but enabled – just „providing“ potential security issues.
Disable like this:
netsh interface isatap set state disabled
netsh interface teredo set state disabled
Don’t delete the content of „c:\windows\ccmcache\“ manually with the File-Explorer:
You need „local Administrator“ access to your computer.
Let SCCM to cleanup it’s cache for you:
1) open the „Control Panel“
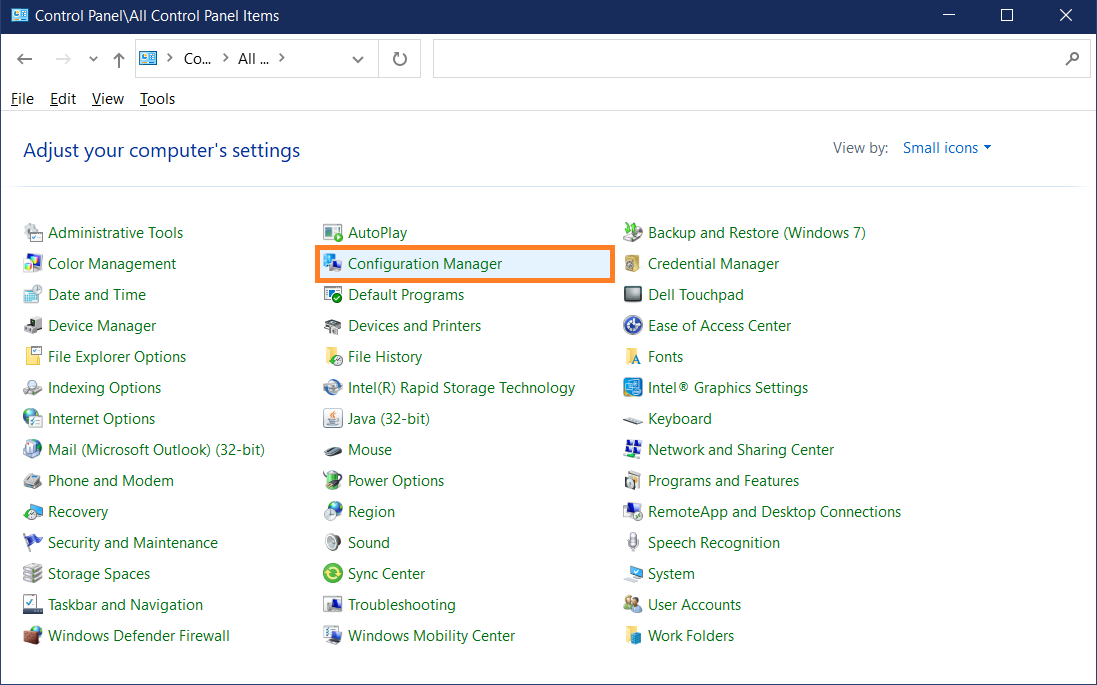
2) select „Configuration Manager“
3) go to „Cache“-Tab
4) click „Delete Files“
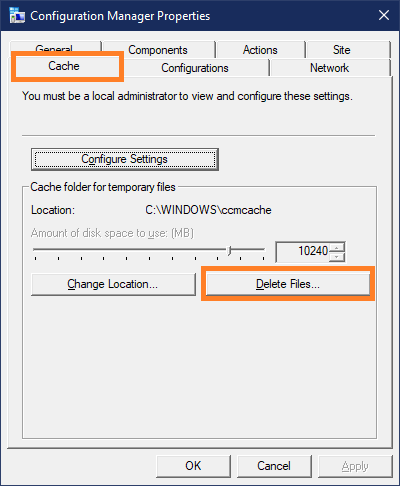
Wait a second and the CCM-Cache is empty.
c:\Windows\ccmcache>dir
 Volume in drive C is Windows
 Volume Serial Number is 5Q4C-0K08

 Directory of c:\Windows\ccmcache

23.09.2021  19:10    <DIR>          .
23.09.2021  19:10    <DIR>          ..
               0 File(s)              0 bytes
               2 Dir(s)  11.164.721.152 bytes free
Until everything in my lab runs on Terraform, PowerShell will be a valid solution for automation purposes.
https://github.com/PowerShell/PowerShell/releases/tag/v7.0.4
Set-ExecutionPolicy Unrestricted
Install-Module -Name VMware.PowerCLI
[Lab Environment]
Set-PowerCLIConfiguration -InvalidCertificateAction:Ignore
Disclaimer
Since i’m trying to get rid of Evernote, too anoying too often, i’ll start to document non-private-stuff here.
The default-MTU allows max. 1472-byte sized ping-packets to be sent (28 Bytes will always get added: 20 Byte IPv4-Header, 8 Byte ICMP-Header).
If you want to test the max. MTU of the LAN, you have to modify the IP-MTU of the Windows-NIC.
List all Interfaces
C:\>netsh interface ipv4 show interfaces
Idx Met MTU State Name--- ---------- ---------- ------------ ---------------------------1 75 4294967295 connected Loopback Pseudo-Interface 127 55 1500 disconnected WLAN12 25 1500 disconnected Local Area Connection* 98 25 1500 disconnected Local Area Connection* 104 5 1500 disconnected ETH_DELL23 25 1500 connected VirtualBox_Host313 25 1500 connected ETH_DOCK24 25 1500 connected VirtualBox_Host111 25 1500 connected VirtualBox_Host29 25 1500 connected Npcap Loopback Adapter5 25 65536 connected Ethernet15 25 1500 connected VirtualBox Host-Only Network #414 1 1500 disconnected Ethernet 4
Interesting is for example ETH_DOCK – my active NIC when the Laptop is mounted to the „docking-station“.C:\>netsh interface ipv4 show subinterface 13
MTU MediaSenseState Bytes In Bytes Out Interface------ --------------- --------- --------- -------------1500 1 255082163 60077137 ETH_DOCK
This doesn’t prove anything – the IP-Packet wont be sent through the NIC, Windows prints the „Packet neneds to be fragmented but DF set“-Message instead.C:\>ping 192.168.2.1 -l 9000 -f
Pinging 192.168.2.1 with 9000 bytes of data:Packet needs to be fragmented but DF set.Packet needs to be fragmented but DF set.Packet needs to be fragmented but DF set.Packet needs to be fragmented but DF set.
Ping statistics for 192.168.2.1:Packets: Sent = 4, Received = 0, Lost = 4 (100% loss),
Modify the IP-MTU
C:\>netsh interface ipv4 set subinterface 13 mtu=9000 store=persistentThe requested operation requires elevation (Run as administrator).
@Retry as adminC:\WINDOWS\system32>netsh interface ipv4 set subinterface 13 mtu=9000 store=persistentOk.
Verify the IP-MTU againC:\> netsh interface ipv4 show subinterface 13
MTU MediaSenseState Bytes In Bytes Out Interface------ --------------- --------- --------- -------------9000 1 255253609 60683324 ETH_DOCK
Now the IP-Ping is sent into the LAN-Switch.
C:\> ping 192.168.2.1 -l 8972 -f
Pinging 192.168.2.1 with 8972 bytes of data:Request timed out.Request timed out.Request timed out.Request timed out.
Ping statistics for 192.168.2.1:Packets: Sent = 4, Received = 0, Lost = 4 (100% loss),
Timeout?
Action Plan:
You got the task to generate a list of IP-Networks connected to LAN „VirtualBox Host-Only Network“. There might be more than one IP-Network.
Use Scapy to crawl through all Interfaces and get the human-readable interface name [only required for windows users]. Use NetIfaces to get a list of IP-Addresses connected to this interface. Use IPAddress to calculate the IP-Network(s) directly connected.
! multiple IPs per Interface supporte
!
from netifaces import AF_INET, AF_INET6, AF_LINK
import netifaces

from scapy.all import *

import ipaddress


if_name = "VirtualBox Host-Only Network"
if_id = ""
if_inet = []

for i in ifaces.data.keys():
  iface = ifaces.data[i]
  wname = iface.data['netid']
  if wname == if_name:
    if_id = i
    addresses = netifaces.ifaddresses(i)
    if AF_INET in addresses:
      for addr in netifaces.ifaddresses(i)[AF_INET]:
        print(addr)
        ipaddr = ipaddress.ip_interface(addr["addr"]+"/"+addr["netmask"])
        ipnetwork = ipaddr.network
        print(ipaddr,ipnetwork)
        if_inet.append(ipnetwork)

print("NAME: {0}\nIP: {1}\nID: {2}".format(if_name,if_inet,if_id))
In my case, only one subnet is directly connected:
...
{'addr': '192.168.56.1', 'netmask': '255.255.255.0', 'broadcast': '192.168.56.255'}
192.168.56.1/24 192.168.56.0/24
>>> print("NAME: {0}\nIP: {1}\nID: {2}".format(if_name,if_inet,if_id))
NAME: VirtualBox Host-Only Network
IP: [IPv4Network('192.168.56.0/24')]
ID: {D30DEC05-D495-4DA1-81F1-42B07885B0EB}
>>>
Using Windows:
Mixing both, provides everything needed.
from netifaces import AF_INET, AF_INET6, AF_LINK
import netifaces

for i in netifaces.interfaces():
   niif=netifaces.ifaddresses(i)
   print("i",i)
   for k,v in niif.items():
     print("Key",k)
     if k==AF_LINK:
       print("LINK:",v)
     if k==AF_INET:
       print("IPv4",v)
     if k==AF_INET6:
       print("IPv6",v)
   print()
>>> for i in netifaces.interfaces():
...    niif=netifaces.ifaddresses(i)
...    print("i",i)
...    for k,v in niif.items():
...      print("Key",k)
...      if k==AF_LINK:
...        print("LINK:",v)
...      if k==AF_INET:
...        print("IPv4",v)
...      if k==AF_INET6:
...        print("IPv6",v)
...    print()
...
i {07E9D8A4-E167-4FFF-B851-61A20C49AE6E}
Key -1000
LINK: [{'addr': '00:00:81:00:de:11'}]
Key 23
IPv6 [{'addr': 'fe80::8400:abb0:2a62:a173%4', 'netmask': 'ffff:ffff:ffff:ffff::/64', 'broadcast': 'fe80::ffff:ffff:ffff:ffff%4'}]

i {D30DEC05-D495-4DA1-81F1-42B07885B0EB}
Key -1000
LINK: [{'addr': '0a:00:27:00:00:14'}]
Key 23
IPv6 [{'addr': 'fe80::1e0:4a4:8afc:90f7%20', 'netmask': 'ffff:ffff:ffff:ffff::/64', 'broadcast': 'fe80::ffff:ffff:ffff:ffff%20'}]
Key 2
IPv4 [{'addr': '192.168.56.1', 'netmask': '255.255.255.0', 'broadcast': '192.168.56.255'}]

i {402C453F-4B74-4883-9257-BD31FAB7AB57}
Key -1000
LINK: [{'addr': '74:70:fd:bd:10:38'}]
Key 23
IPv6 [{'addr': 'fe80::2599:368f:e80d:94b6%8', 'netmask': 'ffff:ffff:ffff:ffff::/64', 'broadcast': 'fe80::ffff:ffff:ffff:ffff%8'}]

i {2120C2CA-E7D4-45DF-8090-A8D7F48EFF42}
Key -1000
LINK: [{'addr': '76:70:fd:bd:10:37'}]
Key 23
IPv6 [{'addr': 'fe80::34d6:9683:4af5:afad%6', 'netmask': 'ffff:ffff:ffff:ffff::/64', 'broadcast': 'fe80::ffff:ffff:ffff:ffff%6'}]

i {F931F123-70A4-4CFB-BD9C-C0A509080286}
Key -1000
LINK: [{'addr': '74:70:fd:bd:10:37'}]
Key 23
IPv6 [{'addr': 'fe80::1926:3c29:1b34:e1f6%22', 'netmask': 'ffff:ffff:ffff:ffff::/64', 'broadcast': 'fe80::ffff:ffff:ffff:ffff%22'}]
Key 2
IPv4 [{'addr': '192.168.1.163', 'netmask': '255.255.255.0', 'broadcast': '192.168.1.255'}]

i {693A5869-6A31-11E8-85D1-806E6F6E6963}
Key -1000
LINK: [{'addr': ''}]
Key 23
IPv6 [{'addr': '::1', 'netmask': 'ffff:ffff:ffff:ffff:ffff:ffff:ffff:ffff/128', 'broadcast': '::1'}]
Key 2
IPv4 [{'addr': '127.0.0.1', 'netmask': '255.0.0.0', 'broadcast': '127.255.255.255'}]
from scapy.all import *

for i in ifaces.data.keys():
  print(i)
  iface = ifaces.data[i]
  wname = iface.data['netid']
  addresses = netifaces.ifaddresses(i)
  af_inet = [{"addr": "0.0.0.0", "netmask": "0.0.0.0", "broadcast": "0.0.0.0"}]
  if AF_INET in addresses:
    af_inet = netifaces.ifaddresses(i)[AF_INET]
  print(wname,af_inet)
>>> for i in ifaces.data.keys():
...   print(i)
...   iface = ifaces.data[i]
...   wname = iface.data['netid']
...   addresses = netifaces.ifaddresses(i)
...   af_inet = [{"addr": "0.0.0.0", "netmask": "0.0.0.0", "broadcast": "0.0.0.0"}]
...   if AF_INET in addresses:
...     af_inet = netifaces.ifaddresses(i)[AF_INET]
...   print(wname,af_inet)
...
{F931F123-70A4-4CFB-BD9C-C0A509080286}
Wi-Fi [{'addr': '192.168.1.163', 'netmask': '255.255.255.0', 'broadcast': '192.168.1.255'}]
{D30DEC05-D495-4DA1-81F1-42B07885B0EB}
VirtualBox Host-Only Network [{'addr': '192.168.56.1', 'netmask': '255.255.255.0', 'broadcast': '192.168.56.255'}]
{07E9D8A4-E167-4FFF-B851-61A20C49AE6E}
ETH_DELL [{'addr': '0.0.0.0', 'netmask': '0.0.0.0', 'broadcast': '0.0.0.0'}]
I expected a nobrainer:
C:\RH>pip install netifaces
Collecting netifaces
  Downloading https://files.pythonhosted.org/packages/81/39/4e9a026265ba944ddf1fea176dbb29e0fe50c43717ba4fcf3646d099fe38/netifaces-0.10.7.tar.gz
Installing collected packages: netifaces
  Running setup.py install for netifaces ... error
    Complete output from command c:\users\rh\appdata\local\programs\python\python37\python.exe -u -c "import setuptools, tokenize;__file__='C:\\Users\\RH\\AppData\\Local\\Temp\\pip-install-wbfanly3\\netifaces\\setup.py';f=getattr(tokenize, 'open', open)(__file__);code=f.read().replace('\r\n', '\n');f.close();exec(compile(code, __file__, 'exec'))" install --record C:\Users\RONALD~1.HEI\AppData\Local\Temp\pip-record-m26yfbyt\install-record.txt --single-version-externally-managed --compile:
    running install
    running build
    running build_ext
    building 'netifaces' extension
    error: Microsoft Visual C++ 14.0 is required. Get it with "Microsoft Visual C++ Build Tools": http://landinghub.visualstudio.com/visual-cpp-build-tools
The suggested URL to download the missing software is wrong (HTTP 404).
and … unlucky…
Now netifaces can get installed:
C:\RH>pip install netifaces
Collecting netifaces
  Using cached https://files.pythonhosted.org/packages/81/39/4e9a026265ba944ddf1fea176dbb29e0fe50c43717ba4fcf3646d099fe38/netifaces-0.10.7.tar.gz
Installing collected packages: netifaces
  Running setup.py install for netifaces ... done
Successfully installed netifaces-0.10.7
After provisioning a new Cisco CSR1000V-Router this script
and returns this Management IP-Address.
First, install „netaddr“-package.
C:\RH>pip install netaddr
Collecting netaddr
  Downloading https://files.pythonhosted.org/packages/ba/97/ce14451a9fd7bdb5a397abf99b24a1a6bb7a1a440b019bebd2e9a0dbec74/netaddr-0.7.19-py2.py3-none-any.whl (1.6MB)
    100% |████████████████████████████████| 1.6MB 4.0MB/s
Installing collected packages: netaddr
Successfully installed netaddr-0.7.19
Obviously far to much hard-coded stuff, just as an example 😉 waiting for a CDP-Neighbor to appear with the following properties:
at the interface
#! /usr/bin/env python

from scapy.all import *
load_contrib("cdp")

from netaddr import IPNetwork, IPAddress

# run it for max. 99 Packets
ip = "0.0.0.0"
wait_for_hostname = "CSR-A"
wait_for_host_in_network = "192.168.56.0/24"

interface="VirtualBox Host-Only Ethernet Adapter"
capturefilter="ether dst 01:00:0c:cc:cc:cc"

while not(IPAddress(ip) in IPNetwork(wait_for_host_in_network)):
  p=sniff(iface=interface, count=1, filter=capturefilter)
  pkt=p[0]
  #print("Packet received",pkt.show())

  #is this a CDP-Packet containing a hostname?
  if (CDPMsgDeviceID in pkt):
    #is this the CDP-Neighbor we're looking for?
    device=pkt["CDPMsgDeviceID"].val.decode()
    hostname=device.split(".")[0]
    #print("Hostname:",hostname)

    if (hostname == wait_for_hostname):
      #is this a CDP-Packet containing a management-IP-Address?
      if (CDPAddrRecordIPv4 in pkt):
        ip=pkt["CDPAddrRecordIPv4"].addr
        #print("IP-Address found:",ip)

#return the IP-Address to the calling application or the CLI
print(ip)
C:\RH>CSR1000v-Virtual-Box.cmd
Enter CSR1000v Hostname:CSR-A
Virtual machine 'CSR-A' is created and registered.
UUID: 8a9c969e-3895-4a7c-9cbc-5f5551bf1b7b
Settings file: 'c:\RH\LAB\VM\CSR-A\CSR-A.vbox'
Creating ISO image at c:\RH\LAB\VM\CSR-A\config.iso, 1 Files, Size: 8,00 KB
100%
0%...10%...20%...30%...40%...50%...60%...70%...80%...90%...100%
Medium created. UUID: 55ea8df5-7e3c-4485-8e08-9302cb61a09d
Waiting for VM "CSR-A" to power on...
VM "CSR-A" has been successfully started.
In a second CMD-Box, and… Be patient, of course.
C:\RH>python wait-for-cdpneighbor.py
192.168.56.101
C:\RH>for /f %I in ('python wait-for-cdpneighbor.py 2^> nul') do @(set ROUTER-IP=%I)
The Public-Key for user „labuser“ is part of my baseline-config used to provision the virtual-router.
C:\RH>putty -ssh -i C:\RH\work\putty-rsa-key\labuser.ppk labuser@%ROUTER-IP%
Works, this is a nice preparation for an automated virtual ansible-lab, too!
How often had i to look up this in the web, always wondering about myself still using the Windows-CMD-shell… Should move on to powershell…
store the output of another command in a variable
c:\RH\>date /T
30.10.2018
c:\RH\>for /f %D in ('date /T 2^> nul') do @(set TTT=%D)

c:\RH\>echo %TTT%
30.10.2018
Not elegant, not intuitive, not self-explanatory: This Shell Scripting language seems not to be made for daily usage 😉