Common OVF Tool (COT) – Automated Lab-Router Deployment

Is this SDN (Software defined Networking)? I think so!
I really love to provision new Cisco CSR1000v lab-routers without the need to do everything manually in the graphical user interface.

It’s possible to provision production-routers, too, of course: Just add your license-information to leave the 100Kbps-limit behind (which is no handicap for normal lab-usage).

The Common OVF Tool (COT) (Documentation) enables me to do this by injecting an initial startup-configuration into the cisco-provided OVA-file before deploying it to an ESXi-host.
Interactive Cisco CLI-Commands possible
And, even better, the Cisco CSR1000V allows interactive CLI-commands within the injected configuration:

  • building new bootflash-directories,
  • creating a SSH-key.

Injecting the bootstrap-config

$ cot --version
Common OVF Tool (COT), version 2.0.3
Copyright (C) 2013-2017 the COT project developers.

$ cot inject-config csr1000v-universalk9.03.16.06b.S.155-3.S6b-ext.ova -c ios-napalm.startup.cfg -o csr1000v-universalk9.03.16.06b.S.155-3.S6b-ext.napalm.ova

This is an example-config setting parameters needed for napalm:
Centralized access to device-configuration and other state-information using NAPALM
Automated RMON Alarm/Event-configuration for class-based QoS-Monitoring using NAPALM

!
hostname NAPALM-1
ip domain-name lab.local
!
no ip domain-lookup
!
crypto key generate rsa modulus 2048
!
username rmond privilege 15 secret rmondpass
!
platform console serial
!
vrf definition MGMT
  address-family ipv4
!
int gig 1
  descr mgmt0
  vrf forwarding MGMT
  ip address dhcp
  no shut
!
ip scp server enable
!
ip access-list standard ACL_SNMP
    permit host 192.168.2.89
!
snmp-server community READ ro ACL_SNMP
snmp-server location allones.de
!
file prompt quiet
!
do mkdir bootflash:/ARCHIVE
archive
  path bootflash:/ARCHIVE/bak
!
line vty 0 4
  login local
  transport input ssh
!
end

Deploy the CSR1000V-Router
One command to deploy the router

  • at an ESXi-Host/vSphere-Datacenter
  • using a defined Datastore
  • creating an serial-port (not really needed since SSH is running immedeately)
  • place the three NICs of this router at the desired vSwitch-Portgroups

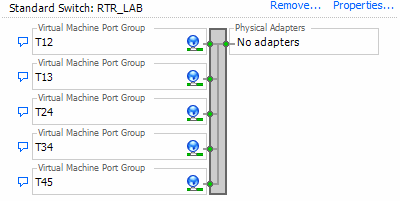
Those vSwitch-Portgroups have been created using vSphere-CLI.

$ cot --verbose deploy csr1000v-universalk9.03.16.06b.S.155-3.S6b-ext.napalm.ova esxi //host/ -u -p -n RTR-NAPALM-1 -d -S "telnet://:31001,server" -N GigabitEthernet1="Management" GigabitEthernet2=T24 GigabitEthernet3=T34 -c 1CPU-4GB

SSH-Access to the router

NAPALM-1# show ssh
Connection Version Mode Encryption  Hmac         State                 Username
0          2.0     IN   aes256-ctr  hmac-sha1    Session started       rmond
0          2.0     OUT  aes256-ctr  hmac-sha1    Session started       rmond
%No SSHv1 server connections running.

NAPALM-1#who
    Line       User       Host(s)              Idle       Location
*  1 vty 0     rmond      idle                 00:00:00 192.168.2.312

NAPALM-1#cd bootflash:ARCHIVE
NAPALM-1#pwd
bootflash:/ARCHIVE/

NAPALM-1#show crypto key mypubkey all
Key name: NAPALM-1.lab.local
Key type: RSA KEYS
 Storage Device: private-config
 Usage: General Purpose Key
 Key is not exportable. Redundancy enabled.
 Key Data:
  30820222 300D0609 2A864886 F70D0101 01050003 82020F00 3082020A 02820201
  ...
  70F5FE1C 01BE930D B3C84841 AC46EE0D 451DC530 55F28B9C 82796E8F 1B5F5163
  57020301 0001

NAPALM-1#show ip int brief
Interface              IP-Address      OK? Method Status                Protocol
GigabitEthernet1       192.168.2.135   YES DHCP   up                    up
GigabitEthernet2       unassigned      YES unset  administratively down down
GigabitEthernet3       unassigned      YES unset  administratively down down

NAPALM-1#show ip route vrf MGMT
Routing Table: MGMT
Gateway of last resort is 192.168.2.1 to network 0.0.0.0

S*    0.0.0.0/0 [254/0] via 192.168.2.1
      192.168.2.0/24 is variably subnetted, 3 subnets, 2 masks
C        192.168.2.0/24 is directly connected, GigabitEthernet1
S        192.168.2.1/32 [254/0] via 192.168.2.1, GigabitEthernet1
L        192.168.2.315/32 is directly connected, GigabitEthernet1

Centralized access to device-configuration and other state-information using NAPALM

Since I still want to build a centralized solution for automated configuration of RMON-alarms to monitor Cisco cbQoS-packet/drop-counters a solution to retrieve and modify device configurations was needed.

The NAPALM (Network Automation and Programmability Abstraction Layer with Multivendor support) Framework seems to provide the required features.
NAPALM Installation
Some NAPALM-IOS dependencies have to be fulfilled first.

sudo apt-get install -y --force-yes libssl-dev libffi-dev python-dev python-cffi

The „partial installation“ seems to be not working anymore, the full installation uses some KB more ressources, not worth to think about the partial installation…

pip install napalm

IOS Preperation
To allow remote-access to the centralized NAPALM server these features need to be enabled in each IOS device:

  • Remote-Access via SSH,
  • SCP (Secure Copy),
  • the IOS „Archive“-feature is the foundation of NAPALM config-operations.
IOS-RTR#conf t
Enter configuration commands, one per line.  End with CNTL/Z.

! AAA preferred for production-systems, of course
IOS-RTR(config)#username rmond privilege 15 secret rmondpass

! required
IOS-RTR(config)#ip scp server enable

! no annoying [yes/no]-prompts for file-operations anymore
IOS-RTR(config)#file prompt quiet

! create the folder in the filesystem for the Archive
IOS-RTR(config)#do mkdir bootflash:/ARCHIVE

IOS-RTR(config)#archive
IOS-RTR(config-archive)#path bootflash:/ARCHIVE/bak-

Explore Napalm

Go the the python shell:

user@snmp-server:~$ python
>>> import napalm
>>> iosdriver = napalm.get_network_driver('ios')

Autodiscovery of the router-filesystem doesn’t work, i know the filesystem of my router and pass it as „optional argument“ to router-object.
*** todo: troubleshoot/fix the autodiscovery ***

>>> router = iosdriver(hostname='192.168.2.72', username='rmond',  password='rmondpass', 
optional_args={'port': 22, 'dest_file_system': 'bootflash:'})
>>> router.open()

Go to the router cli-shell:

  • user „rmond“ is logged in
IOS-RTR#who
    Line       User       Host(s)              Idle       Location
*  1 vty 0     user       idle                 00:00:00 192.168.2.109
   2 vty 1     rmond      idle                 00:00:02 192.168.2.89

Back to python, try some NAPALM-functions.

>>> print router.get_facts()
{u'os_version': u'CSR1000V Software (X86_64_LINUX_IOSD-UNIVERSALK9-M), Version 15.4(2)S3, RELEASE SOFTWARE (fc2)', 
u'uptime': 657600, u'interface_list': [u'GigabitEthernet1', u'GigabitEthernet2', u'GigabitEthernet3'], u'vendor': u'Cisco', 
u'serial_number': u'afdökjl0123', u'model': u'CSR1000V', u'hostname': u'IOS-RTR', u'fqdn': u'IOS-RTR.lab.local'}

Execute interactive EXEC-Commands.

>>> cliping=['ping 192.168.2.1']
>>> print router.cli(cliping)
{'ping 192.168.2.1': u'Type escape sequence to abort.\n
Sending 5, 100-byte ICMP Echos to 192.168.2.1, timeout is 2 seconds:\n!!!!!\n
Success rate is 100 percent (5/5), round-trip min/avg/max = 1/1/2 ms'}

Fetch the current running-config.

>>> clishowrun=['show running-config']
>>> print router.cli(clishowrun)
{'show running-config': u'Building configuration...\n\nCurrent configuration : 2411 bytes\n!\n
! Last configuration change at 12:52:32 UTC Fri Nov 24 2017 by user\n! NVRAM config last updated at 10:24:26 UTC Fri Nov 24 2017 by user\n!\n
version 15.4\nservice timestamps debug datetime msec\nservice timestamps log datetime msec\n
...rmon event 10 log owner RMONevent\nrmon event 11 log owner RMONevent\n
rmon alarm 10001 cbQosCMStatsEntry.2.18.65536 300 delta rising-threshold 1 11 falling-threshold 0 10 owner RMONevent\n
...
end'}

Read some lines from the running-config, filter using the pipe.

>>> cligetrmon=['show rmon alarms | inc RMONevent']
>>> print router.cli(cligetrmon)
{'show rmon alarms | inc RMONevent': u'Alarm 10001 is active, owned by RMONevent'}

Log-out if you are finished:

>>> router.close()

Linux: SNMPv3 with Python

Works out of the box.

  • if you’re fine with AES128-Encryption.

AES256 might not be a requirement in all cases, but having the opportunity to choose seems to be not absolutely absurd in 2017… Good news: The NetSNMP-AES192/256-patch is on the way.

EasySNMP installation and usage
I’d like to refer to Linux: SNMP with Python for the basics.

IOS-Config: VIEW/GROUP/USER
Take the opportunity and leverage SMP-Views to limit access to several SNMP-OIDs.

snmp-server view SV_EASYSNMP interfaces included
snmp-server view SV_EASYSNMP ciscoCdpMIB included
snmp-server view SV_EASYSNMP ciscoCBQosMIB included

ip access-list standard ACL_SNMP
 permit 192.168.2.89

snmp-server group SG_EASYSNMP v3 auth read SV_EASYSNMP access ACL_SNMP

snmp-server user EASYSNMP SG_EASYSNMP v3 auth sha AUTHPASS priv aes 128 PRIVPASS

EasySNMP: „Session“-Object with SNMPv3-Credentials
Find the official docs here: EasySNMP Session-API

Security level could be:

  • no_auth_or_privacy
    • If you want to use the user-based authentication without need for security
  • auth_without_privacy
    • Authentication only might be „good enough“ when traffic is fully kept within a management network
  • auth_with_privacy

Authentication-Procol:

  • MD5
  • SHA

Privacy-Protocol:

  • AES
    • AES128
  • DES, 3DES
    • For very outdated devices

Create the Session-Object

>>> session3 = Session(hostname='192.168.2.72', version=3,
security_level="auth_with_privacy", security_username="EASYSNMP",
auth_protocol="SHA", auth_password="AUTHPASS",
privacy_protocol="AES", privacy_password="PRIVPASS")

Use this „session“ as before.

>>> session3.walk("1.3.6.1.4.1.9.9.166.1.15.1.1.2")
[<SNMPVariable value='9' (oid='enterprises.9.9.166.1.15.1.1.2.18.65536', oid_index='',
snmp_type='COUNTER')>, <SNMPVariable value='0' (oid='enterprises.9.9.166.1.15.1.1.2.18.131072', oid_index='',
snmp_type='COUNTER')>, <SNMPVariable value='6039' (oid='enterprises.9.9.166.1.15.1.1.2.18.196608', oid_index='', snmp_type='COUNTER')>, <SNMPVariable value='0' (oid='enterprises.9.9.166.1.15.1.1.2.34.65536', oid_index='',
snmp_type='COUNTER')>, <SNMPVariable value='0' (oid='enterprises.9.9.166.1.15.1.1.2.34.131072', oid_index='',
snmp_type='COUNTER')>, <SNMPVariable value='0' (oid='enterprises.9.9.166.1.15.1.1.2.34.196608', oid_index='',
snmp_type='COUNTER')>]

Linux: vSphere CLI Installation

Sometimes I need a lightweight straight-forward toolset to provision, modify or delete vSphere-Objects.

Installation was a nightmare in former times, but vSphere CLI Release 6.5 works with Ubuntu server 16.04.3 LTS „out of the box“.

And – it’s compatible with ESXi 6.0 hosts. (don’t waste time trying to install vSphere CLI Release 6.0 on a current Linux Server)

Consider the docs:
vSphere CLI Documentation
VMware [Code] vSphere-CLI 6.5

Download the 64-bit Archive
Use the vmware-search or Google…
„Download VMware vSphere Command Line Interface 6.5“ might be a promising query.

I downloaded VMware-vSphere-CLI-6.5.0-4566394.x86_64.tar.gz using my Windows Machine.

Transfer the Archive to the Linux-VM using SCP
Since SCP is available at the Linux-VM and this protocol is fast and secure i don’t see the requirement to think about alternative protocols.

  • I’d suggest to use „PSCP“ from the PuTTY-Suite.
c:\temp>pscp -2 VMware-vSphere-CLI-6.5.0-4566394.x86_64.tar.gz USER_NAME@LINUX_VM_IP:VMware-vSphere-CLI-6.5.0-4566394.x86_64.tar.gz
USER_NAME@LINUX-VM-IP's password: USER_PASS
VMware-vSphere-CLI-6.5.0- | 52264 kB | 3266.5 kB/s | ETA: 00:00:00 | 100%

Disable unneded SSH-Localization
The VMware-Installer seems to not expect non-US-Computers, so avoid automatic special characters from Germany in the SSH-shell.

user@snmp-server:~$ sudo cp /etc/ssh/ssh_config /etc/ssh/ssh_config.bak

Just comment the „SendEnv LANG LC_*“-line:

user@snmp-server:~$ sudo joe /etc/ssh/ssh_config

like this:

user@snmp-server:~$ diff /etc/ssh/ssh_config.bak /etc/ssh/ssh_config
53c53
<     SendEnv LANG LC_*
---
> #    SendEnv LANG LC_*

Install Prerequisites
Taken from Installing Prerequisite Software for Linux Systems with Internet Access „Ubuntu 16.04 64-bit“-Section:

sudo apt-get install lib32z1 lib32ncurses5 build-essential uuid uuid-dev libssl-dev perl-doc libxml-libxml-perl libcrypt-ssleay-perl libsoap-lite-perl libmodule-build-perl

Install vSphere CLI

user@snmp-server:~$ tar xzf VMware-vSphere-CLI-6.5.0-4566394.x86_64.tar.gz

user@snmp-server:~$ sudo vmware-vsphere-cli-distrib/vmware-install.pl
Creating a new vSphere CLI installer database using the tar4 format.

Installing vSphere CLI 6.5.0 build-4566394 for Linux.

You must read and accept the vSphere CLI End User License Agreement to
continue.
Press enter to display it.

VMware® vSphere Software Development Kit License Agreement

Do you accept? (yes/no) yes

Thank you.
WARNING: The http_proxy environment variable is not set. If your system is
using a proxy for Internet access, you must set the http_proxy environment
variable .

If your system has direct Internet access, you can ignore this warning .

WARNING: The ftp_proxy environment variable is not set.  If your system is
using a proxy for Internet access, you must set the ftp_proxy environment
variable .

If your system has direct Internet access, you can ignore this warning .

Please wait while configuring CPAN ...

Below mentioned modules with their version needed to be installed,
these modules are available in your system but vCLI need specific
version to run properly

Module: ExtUtils::MakeMaker, Version: 6.96
Module: Module::Build, Version: 0.4205
Module: Net::FTP, Version: 2.77
Module: LWP::Protocol::https, Version: 6.04
Do you want to continue? (yes/no) yes

Be patient, do something else in the meantime…


        Please wait while configuring perl modules using CPAN ...

CPAN is downloading and installing pre-requisite Perl module "Devel::StackTrace" .
CPAN is downloading and installing pre-requisite Perl module "Class::Data::Inheritable" .
CPAN is downloading and installing pre-requisite Perl module "Convert::ASN1" .
CPAN is downloading and installing pre-requisite Perl module "Crypt::OpenSSL::RSA" .
CPAN is downloading and installing pre-requisite Perl module "Crypt::X509" .
CPAN is downloading and installing pre-requisite Perl module "Exception::Class" .
CPAN is downloading and installing pre-requisite Perl module "UUID::Random" .
CPAN is downloading and installing pre-requisite Perl module "Archive::Zip" .
CPAN is downloading and installing pre-requisite Perl module "Path::Class" .
CPAN is downloading and installing pre-requisite Perl module "Class::MethodMaker" .
CPAN is downloading and installing pre-requisite Perl module "UUID" .
CPAN is downloading and installing pre-requisite Perl module "Data::Dump" .
CPAN is downloading and installing pre-requisite Perl module "Socket6 " .
CPAN is downloading and installing pre-requisite Perl module "IO::Socket::INET6" .
CPAN is downloading and installing pre-requisite Perl module "Net::INET6Glue" .

In which directory do you want to install the executable files? [/usr/bin]

Please wait while copying vSphere CLI files...

The installation of vSphere CLI 6.5.0 build-4566394 for Linux completed
successfully. You can decide to remove this software from your system at any
time by invoking the following command:
"/usr/bin/vmware-uninstall-vSphere-CLI.pl".

This installer has successfully installed both vSphere CLI and the vSphere SDK for Perl.

Enjoy,
--the VMware team

Give it a try: Add a vSwitch with 5 Portgroups

user@snmp-server:~$ vicfg-vswitch --help

Synopsis: /usr/bin/vicfg-vswitch OPTIONS [<vswitch>]


Command-specific options:
   --add
    -a
          Add a new virtual switch
   --add-dvp-uplink
    -P
          Add an uplink adapter (pnic) to a DVPort (valid for vSphere 4.0 and later)
   --add-pg
    -A
          Add a portgroup to a virtual switch
...

Define credentials to login into the vSphere-Environment

user@snmp-server:~$ export VI_SERVER=%SERVER_IP_OR_HOSTNAME%
user@snmp-server:~$ export VI_USERNAME=%VSPHERE_USER_NAME%
user@snmp-server:~$ export VI_PASSWORD=%VSPHERE_USER_PASS%

Create the Switch and the portgroups

user@snmp-server:~$ vicfg-vswitch --add "RTR_LAB" -h %ESXi-HOST-IP%

user@snmp-server:~$ vicfg-vswitch -A "T12" "RTR_LAB" -h %ESXi-HOST-IP%
user@snmp-server:~$ vicfg-vswitch -A "T13" "RTR_LAB" -h %ESXi-HOST-IP%
user@snmp-server:~$ vicfg-vswitch -A "T24" "RTR_LAB" -h %ESXi-HOST-IP%
user@snmp-server:~$ vicfg-vswitch -A "T34" "RTR_LAB" -h %ESXi-HOST-IP%
user@snmp-server:~$ vicfg-vswitch -A "T45" "RTR_LAB" -h %ESXi-HOST-IP%

Isn’t it beautiful? 😉
vSwitch RTR_LAB with 5 portgroups

And i think, even with downloading and installing vSphere-CLI it was faster than GUI-clicking to create this vSwitch 😉

Configure RMON Alarms&Events by script

Getting back to the original task..
Use a script on a centralized Controller-VM to figure out for which SNMP-OID RMON-Alarms should get configured

Get all current QoS-Drop-Counters, check the traffic-direction to monitor only outbount-queues, generate RMON-Alarms.

hostname = "192.168.2.72"

session = Session(hostname, community='READ', version=2)

cbqos = session.walk('1.3.6.1.4.1.9.9.166.1.15.1.1.13')

cmds = ["Configure on Host \""+hostname+"\"\n---"]
cmds.append("rmon event 10 log owner RMONevent")
cmds.append("rmon event 11 log owner RMONevent")

alarmID = 10001

for i in cbqos:
  oidList=i.oid.split(".")
  q=oidList.pop()
  p=oidList.pop()
  #print p,q
  ifTypeID=int(session.get("1.3.6.1.4.1.9.9.166.1.1.1.1.2."+p).value)
  ifDirID=int(session.get("1.3.6.1.4.1.9.9.166.1.1.1.1.3."+p).value)
  if (ifDirID==2):
    cmds.append("rmon alarm "+str(alarmID)+" "+i.oid+" 300 delta rising-threshold 1 11 falling-threshold 0 10 owner RMONevent")
  alarmID += 1

for cmd in cmds:
  print cmd

Example Output:

Configure on Host "192.168.2.72"
---
rmon event 10 log owner RMONevent
rmon event 11 log owner RMONevent
rmon alarm 10001 enterprises.9.9.166.1.15.1.1.13.18.65536 300 delta rising-threshold 1 11 falling-threshold 0 10 owner RMONevent
rmon alarm 10002 enterprises.9.9.166.1.15.1.1.13.18.131072 300 delta rising-threshold 1 11 falling-threshold 0 10 owner RMONevent
rmon alarm 10003 enterprises.9.9.166.1.15.1.1.13.18.196608 300 delta rising-threshold 1 11 falling-threshold 0 10 owner RMONevent
rmon alarm 10004 enterprises.9.9.166.1.15.1.1.13.34.65536 300 delta rising-threshold 1 11 falling-threshold 0 10 owner RMONevent
rmon alarm 10005 enterprises.9.9.166.1.15.1.1.13.34.131072 300 delta rising-threshold 1 11 falling-threshold 0 10 owner RMONevent
rmon alarm 10006 enterprises.9.9.166.1.15.1.1.13.34.196608 300 delta rising-threshold 1 11 falling-threshold 0 10 owner RMONevent

Todo: Verify existing RMON-Alarm/Event-Configuration at the device
Todo: Push the config automatically to the device

Getting Details of a Traffic Class from the SNMP-MIB

Today I’ll show how retrieve additional details from already discoverd QoS-Counters. They are mostly descriptive, for human eyes.
The „Traffic-Direction“-Attribute might be relevant since in most cases only outbound drop-counters might be interesting, so the discovered list of OIDs could get filtered to process only those outbound OIDs.

Refresh: Retrieve all „QoS Packet-Counters“

>>> cbqos = session.walk('1.3.6.1.4.1.9.9.166.1.15.1.1.2')
>>> print cbqos
[<SNMPVariable value='9' (oid='enterprises.9.9.166.1.15.1.1.2.18.65536', oid_index='', snmp_type='COUNTER')>,
<SNMPVariable value='0' (oid='enterprises.9.9.166.1.15.1.1.2.18.131072', oid_index='', snmp_type='COUNTER')>,
<SNMPVariable value='1035' (oid='enterprises.9.9.166.1.15.1.1.2.18.196608', oid_index='', snmp_type='COUNTER')>,
<SNMPVariable value='0' (oid='enterprises.9.9.166.1.15.1.1.2.34.65536', oid_index='', snmp_type='COUNTER')>,
<SNMPVariable value='0' (oid='enterprises.9.9.166.1.15.1.1.2.34.131072', oid_index='', snmp_type='COUNTER')>,
<SNMPVariable value='0' (oid='enterprises.9.9.166.1.15.1.1.2.34.196608', oid_index='', snmp_type='COUNTER')>]

There are two Policy-Objects #P:

  • Policy #18
  • Policy #34

Both Policy-Objects contain three Traffic-Classes #Q:

  • Class #65535
  • Class #131072
  • Class #196608

Attributes of a bound Policy #P

Each Policy has at least two attributes:

  • Interface-Type of the Policy (5 : CoPP)
    • 1:mainInterface
    • 2:subInterface
    • 3:frDLCI
    • 4:atmPVC
    • 5:controlPlane
    • 6:vlanPort
    • 7:evc
  • Traffic-Direction
    • 1:input
    • 2:output
  • Interface bound to

Get the type of a Policy = „cbQosServicePolicyEntry.2.#P“ = „1.3.6.1.4.1.9.9.166.1.1.1.1.2.#P“

  • both are type „1“ = Main-Interface
>>> print session.get("1.3.6.1.4.1.9.9.166.1.1.1.1.2.18")
<SNMPVariable value='1' (oid='enterprises.9.9.166.1.1.1.1.2.18', oid_index='', snmp_type='INTEGER')>
>>> print session.get("1.3.6.1.4.1.9.9.166.1.1.1.1.2.34")
<SNMPVariable value='1' (oid='enterprises.9.9.166.1.1.1.1.2.34', oid_index='', snmp_type='INTEGER')>

Direction = „cbQosServicePolicyEntry.3.#P“ = „1.3.6.1.4.1.9.9.166.1.1.1.1.3.#P“

  • both are direction „2“ = Output
>>> print session.get("1.3.6.1.4.1.9.9.166.1.1.1.1.3.18")
<SNMPVariable value='2' (oid='enterprises.9.9.166.1.1.1.1.3.18', oid_index='', snmp_type='INTEGER')>
>>> print session.get("1.3.6.1.4.1.9.9.166.1.1.1.1.3.34")
<SNMPVariable value='2' (oid='enterprises.9.9.166.1.1.1.1.3.34', oid_index='', snmp_type='INTEGER')>

Interface-ID = „cbQosServicePolicyEntry.4.#P“ = „1.3.6.1.4.1.9.9.166.1.1.1.1.4.#P“ (cbQosIfIndex)

  • Policy#18 is bound to Interface #1
  • Policy#34 is bound to Interface #2
>>> print session.get("1.3.6.1.4.1.9.9.166.1.1.1.1.4.18")
<SNMPVariable value='1' (oid='enterprises.9.9.166.1.1.1.1.4.18', oid_index='', snmp_type='INTEGER')>
>>> print session.get("1.3.6.1.4.1.9.9.166.1.1.1.1.4.34")
<SNMPVariable value='2' (oid='enterprises.9.9.166.1.1.1.1.4.34', oid_index='', snmp_type='INTEGER')>

Interface-NAME = „1.3.6.1.2.1.2.2.1.2.#IFID“ (ifDescr)

  • Interface#1 is named „GigabitEthernet1“
  • Interface#2 is named „GigabitEthernet2“
>>> print session.get("1.3.6.1.2.1.2.2.1.2.1")
<SNMPVariable value='GigabitEthernet1' (oid='ifDescr', oid_index='1', snmp_type='OCTETSTR')>
>>> print session.get("1.3.6.1.2.1.2.2.1.2.2")
<SNMPVariable value='GigabitEthernet2' (oid='ifDescr', oid_index='2', snmp_type='OCTETSTR')>

Attributes of the Traffic-Classes #Q in Policy #P

Each Traffic-Class has (beyond of all counters) the attribute:

  • Name

Class-ID = „1.3.6.1.4.1.9.9.166.1.5.1.1.2.#P.#Q“ (cbQosConfigIndex)

  • Class #65535 in Policy #18 has ID #309479785
  • Class #131072 in Policy #18 has ID #342719994
  • Class #196608 in Policy #18 has ID #1593
  • Class #65535 in Policy #34 has ID #309479785
  • Class #131072 in Policy #34 has ID #342719994
  • Class #196608 in Policy #34 has ID #1593

since the Class-IDs are the same, it seems to be one and the same policy-map bound to two interfaces

>>> print session.get("1.3.6.1.4.1.9.9.166.1.5.1.1.2.18.65536")
<SNMPVariable value='309479785' (oid='enterprises.9.9.166.1.5.1.1.2.18.65536', oid_index='', snmp_type='GAUGE')>
>>> print session.get("1.3.6.1.4.1.9.9.166.1.5.1.1.2.18.131072")
<SNMPVariable value='342719994' (oid='enterprises.9.9.166.1.5.1.1.2.18.131072', oid_index='', snmp_type='GAUGE')>
>>> print session.get("1.3.6.1.4.1.9.9.166.1.5.1.1.2.18.196608")
<SNMPVariable value='1593' (oid='enterprises.9.9.166.1.5.1.1.2.18.196608', oid_index='', snmp_type='GAUGE')>
>>> print session.get("1.3.6.1.4.1.9.9.166.1.5.1.1.2.34.196608")
<SNMPVariable value='1593' (oid='enterprises.9.9.166.1.5.1.1.2.34.196608', oid_index='', snmp_type='GAUGE')>
>>> print session.get("1.3.6.1.4.1.9.9.166.1.5.1.1.2.34.65536")
<SNMPVariable value='309479785' (oid='enterprises.9.9.166.1.5.1.1.2.34.65536', oid_index='', snmp_type='GAUGE')>
>>> print session.get("1.3.6.1.4.1.9.9.166.1.5.1.1.2.34.131072")
<SNMPVariable value='342719994' (oid='enterprises.9.9.166.1.5.1.1.2.34.131072', oid_index='', snmp_type='GAUGE')>
>>> print session.get("1.3.6.1.4.1.9.9.166.1.5.1.1.2.34.196608")
<SNMPVariable value='1593' (oid='enterprises.9.9.166.1.5.1.1.2.34.196608', oid_index='', snmp_type='GAUGE')>
>>>

Class-NAME = „1.3.6.1.4.1.9.9.166.1.7.1.1.1.#CLASS-ID“ (cbQosCMName)

  • Class #309479785 has the name „CM_VOIP_RTP“
  • Class #342719994 has the name „CM_VOIP_CTRL“
  • Class #1593 has the name „class-default“
>>> print session.get("1.3.6.1.4.1.9.9.166.1.7.1.1.1.309479785")
<SNMPVariable value='CM_VOIP_RTP' (oid='enterprises.9.9.166.1.7.1.1.1.309479785', oid_index='', snmp_type='OCTETSTR')>
>>> print session.get("1.3.6.1.4.1.9.9.166.1.7.1.1.1.342719994")
<SNMPVariable value='CM_VOIP_CTRL' (oid='enterprises.9.9.166.1.7.1.1.1.342719994', oid_index='', snmp_type='OCTETSTR')>
>>> print session.get("1.3.6.1.4.1.9.9.166.1.7.1.1.1.1593")
<SNMPVariable value='class-default' (oid='enterprises.9.9.166.1.7.1.1.1.1593', oid_index='', snmp_type='OCTETSTR')>

Put it all together
Fetch the list of all „Packet-Counter“-OIDs.

Get the Queue/Class-Details and the Packet-Counter per Class.

session = Session(hostname='192.168.2.72', community='READ', version=2)

cbqos = session.walk('1.3.6.1.4.1.9.9.166.1.15.1.1.2')

ifType=["","mainInterface","subInterface","frDLCI","atmPVC","controlPlane","vlanPort","evc"]
ifDir=["","input","output"]

for i in cbqos:
  oidList=i.oid.split(".")
  q=oidList.pop()
  p=oidList.pop()

  ifTypeID=int(session.get("1.3.6.1.4.1.9.9.166.1.1.1.1.2."+p).value)
  ifDirID=int(session.get("1.3.6.1.4.1.9.9.166.1.1.1.1.3."+p).value)
  ifID=session.get("1.3.6.1.4.1.9.9.166.1.1.1.1.4."+p).value
  ifName=session.get("1.3.6.1.2.1.2.2.1.2."+ifID).value
  classID=session.get("1.3.6.1.4.1.9.9.166.1.5.1.1.2."+p+"."+q).value
  className=session.get("1.3.6.1.4.1.9.9.166.1.7.1.1.1."+classID).value
  pktCounter=session.get(i.oid).value
  print ifName+"("+ifType[ifTypeID]+")"+ifDir[ifDirID],className,pktCounter+" Packets"

Example Output:

GigabitEthernet1(mainInterface)output CM_VOIP_RTP 9 Packets
GigabitEthernet1(mainInterface)output CM_VOIP_CTRL 0 Packets
GigabitEthernet1(mainInterface)output class-default 1716 Packets
GigabitEthernet2(mainInterface)output CM_VOIP_RTP 0 Packets
GigabitEthernet2(mainInterface)output CM_VOIP_CTRL 0 Packets
GigabitEthernet2(mainInterface)output class-default 0 Packets

Exploring the SNMP-MIB for Class-based QoS

Discover the OIDs representing the counter-values of all active traffic-classes

Ciscos „SNMP Object Navigator“ (http://mibs.cloudapps.cisco.com/ITDIT/MIBS/servlet/index) is our friend to get the base-OID when you know the name of the MIB:

  • Object-NAME <=> Object-ID (OID)
  • „cbQosCMStatsEntry“ <=> „1.3.6.1.4.1.9.9.166.1.15.1.1“

Each object is a set of all counters from „show policy-map interface“-command, the Object Navigator documents the ID of these counters, too.
„Exploring the SNMP-MIB for Class-based QoS“ weiterlesen

Refresher: RMON @ Cisco IOS

RMON Refresher
Think about this given Router-Configuration:

class-map match-all CM_VOIP_CTRL
 match dscp af31
class-map match-all CM_VOIP_RTP
 match dscp ef

policy-map PM_OUT
 class CM_VOIP_RTP
  priority percent 10
 class CM_VOIP_CTRL
  bandwidth percent 1
 class class-default
  fair-queue
!
interface GigabitEthernet1
 ip address 192.168.2.72 255.255.255.0
 service-policy output PM_OUT

Three Queues at interface Gig1:

  • CM_VOIP_RTP
  • CM_VOIP_CTRL
  • class-default

with per-Queue-Statistics:

  • Packet counters
  • Drop-counters
  • etc.

In these first examples, i don’t want to wait for queue-drops, i’ll just generate DSCP=EF-Traffic by the ping-command and watch the Queue-Packet-Counters, not Drops.
Configure RMON Alarms and Events
I’ll add two RMON-Events

rmon event 10 log owner RMONevent
rmon event 11 log owner RMONevent

event #10 = rising-threshold – in my example: >1 Packet has been dropped forwarded
event #11 = the falling-threshold – no packets have been…

Than, instruct the Router to have a look at a QoS-counter:

rmon alarm 10001 enterprises.9.9.166.1.15.1.1.2.18.65536 300 delta rising-threshold 1 11 falling-threshold 0 10 owner RMONevent

In the upcoming post I’ll discover the RMON-MIB to illustrate where the „enterprise.9….65536“-Parameter comes from.

This alarm #10001 monitors:

  • the value the QoS-counter with OID „enterprises.9.9.166.1.15.1.1.2.18.65536“ (Pkt-Counter of the RTP-Queue).
  • every 300s
  • watch for delta-values (not for absolute counters which might be interesting when monitoring temperatures, fan-speed etc…)
  • define a hysteresis:
    • rising: if the last counter-delta „was <1" and "is now >=1″ – it raises event#11.
    • falling: if the last counter-delta „was >=1“ and „is now <1" - it raises event#10.

Both events instruct the router to generate a syslog-message.
In production event 10 will be configured without the „log“-option [to do nothing]. This config is for demonstration purpose.

Forward some Traffic

Generate some Traffic (TOS 184 = DSCP 46 = Expedited Forwarding (EF).

IOS-RTR#ping 192.168.2.1 tos 184
Type escape sequence to abort.
Sending 5, 100-byte ICMP Echos to 192.168.2.1, timeout is 2 seconds:
!!!!!
Success rate is 100 percent (5/5), round-trip min/avg/max = 1/2/5 ms

So – the Queue wasn’t used before:

  • the old-counter has been „0“
  • now 5 Packets have been forwarded

This delta-counter „5“ has exceeded rising-threshold „1“:

  • event#11 should be raised.

When?

  • we’ll have to wait between 0..300s for the cyclic 300s-alarm-interval to fire
IOS-RTR#
*Nov 20 14:54:39.015: %RMON-5-RISINGTRAP: Rising threshold has been crossed because the value of cbQosCMStatsEntry.2.18.65536 exceeded the rising-threshold value 1

The current counter is „5“:

  • whithout rtp-data, the next delta-counter will be 0.

Wait for the next 300s interval:

  • the falling-event#10 should get raised.
IOS-RTR#
*Nov 20 14:59:38.837: %RMON-5-FALLINGTRAP: Falling threshold has been crossed because the value of cbQosCMStatsEntry.2.18.65536 has fallen below the falling-threshold value 0

Works, perfect!

Linux: SNMP with Python

Background: I plan to design and implement a controller-based QoS-Solution with distributed control-plane using SNMP and RMON.

How to send SNMP-Requests in Python?

Why Python? It’s an arbitrary decision, every programming language might be sufficient. For the moment, I prefer Python for new projects.

I decided to try Easy-SNMP, since good performance and a nice python-programming-interface seem to be killer-features for me.

EasySNMP homepage
EasySNMP documentation

A development environment

  1. clone an ubuntu-server VM

https://allones.de/2017/11/17/linux-quick-and-…ab-vm-deployment/

  1. install net-snmp

sudo apt-get install libsnmp-dev snmp-mibs-downloader

  1. install gcc, python

sudo apt-get install gcc python-dev python-pip

  1. install EasySNMP

pip install easysnmp

Enable SNMP on a Router
Never ever enable SNMP-Access for everybody, don’t even think about it.
Use an ACL permitting only the SNMP-Manager.

ip access-list standard ACL_SNMP
    permit host 192.168.2.89

snmp-server community READ ro ACL_SNMP

! just as an example System-Variable
snmp-server location allones.de

Access the Router via SNMP
The router’s LAN-IP is 192.168.2.72.

I like the „Session“-Interface:

user@snmp-server:~$ python
Type "help", "copyright", "credits" or "license" for more information.
>>>
>>> from easysnmp import Session
>>>
>>> session = Session(hostname='192.168.2.72', community='READ', version=2)

Be aware to poll the Object-Instance, not the Object-Tree-Position.
Wrong

>>> location = session.get('sysLocation')
>>> print location
<SNMPVariable value='NOSUCHINSTANCE' (oid='sysLocation', oid_index='', snmp_type='NOSUCHINSTANCE')>

Correct: Specify an Instance-ID

>>>
>>> location = session.get('sysLocation.0')
>>> print location
<SNMPVariable value='allones.de' (oid='sysLocation', oid_index='0', snmp_type='OCTETSTR')>

Works!

How to access the return-value?
How to verify the Datatype?

I’ve been using the Cisco-developed TCL-Interface for years, the „snmp_getone“-command there, where you had to parse the return-value (a string similar to the „location“-Variable above) applying regular expressions… Weird.

Just remembering the blog post, which motivated me to learn TCL… Ten years old, how time flies!
Read: „SNMP with TCL“ by Ivan Pepelnjak

Might this be easy with EasySNMP?

>>> print location.value
allones.de

>>> print location.oid
sysLocation
>>> print location.oid_index
0

>>> print location.snmp_type
OCTETSTR

Isn’t EasySNMP beautiful!? 🙂

Linux: Quick and Clean Lab-VM Deployment

I often need for quick tests a clean Linux Server, a VM nowadays.

I decided to save DRAM in my virtualization host and to:

  • not use a GUI
  • SSH with standard text-editor are quite fine for me.

Ubuntu 16.04 seems to be a good choice to start with.

  1. Apply Updates,

sudo apt-get update && sudo apt-get upgrade -y

  1. install a text-editor //I like joe since it remembers me of turbo-pascal/wordstar 😉

sudo apt-get install joe

  1. change the hostname of the server-vm
sudo joe /etc/hostname
sudo joe /etc/hosts
  1. add a reliable (static) IP-Address
sudo joe /etc/network/interfaces
# The loopback network interface
auto lo
iface lo inet loopback

# The primary network interface
auto ens160
iface ens160 inet static
address 192.168.2.89
netmask 255.255.255.0
gateway 192.168.2.1
dns-nameservers 192.168.2.1
dns-search lab.local
  1. reboot the VM

There are other possibilities, but just ifdown/ifup won’t stop the dhcpd-client – the easiest way [but uncoolest, who cares?] is to reboot the VM, takes half a second…

sudo reboot


Todo: Create an UCSD-Workflow for this

Todo: Fix the buggy „always 1“ section-numbering